Saturday, November 28, 2015

Meditations on the Hip Joint and Pelvic Girdle - Max Popov (2011)


Bookfinder:


MEDITATIONS ON THE HIP JOINT AND PELVIC GIRDLE
by 
Max Popov


Outline:


On Stability - Introduction to the Hip Joint and Pelvic Girdle

The standing human body is stable  when its line of gravity falls within its base of support; namely, our two feet and the area between them. Stability becomes increasingly precarious as our center of gravity nears the edge of our base. When the line of gravity falls outside our feet, we fall.


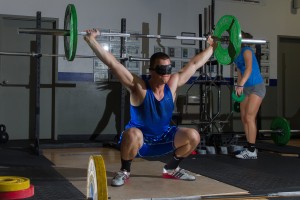
On Standing Up - Bent-Leg Hip Extension and Hanging Knee Raise

If we think about the mechanics of rising at all, it's probably because our ability to stand (or the ability of someone close to us) has been impaired or even lost. During the weight-resistance yoga session, when we reflect on what it means to be human, we consider how standing up is a critical aspect of not only our daily life and the evolutionary development of our species but also the biological development of the individual.


On Arrested Falling - Hip Abduction and Hip Adduction 

While not an act of derring-do, like that of a tightrope walker crossing a high wire, the simple of walking on the ground is, when you think about it, an amazing balancing act all the same. A rhythmical movement in which the center of gravity is swung forward, human bipedal gait places us in peril at every step.


By cultivating gladness for those who are happy, compassion for those who are suffering, delight in those who are kind-hearted and disregard for those who are selfish and mean, we habitually remain calm. - Patanjali


An object's center of gravity - the place where the Earth's gravity is considered to act on the object - is the point at which its mass is concentrated. Located within the object (say, a hard-boiled egg, a baseball bat, or an automobile), but not usually coinciding with its geometric center, the center of gravity can be approximated by finding the object's balance point, the place where the object can be twirled about (at least theoretically) on one finger.

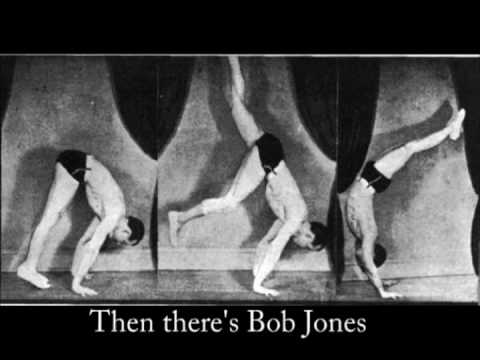
In the standard anatomic position (standing upright with the palms of the hands forward), the human body's center of gravity - the point around which the body's mass is evenly distributed - lies approximately just in front of the second sacral vertebra. (The precise location depends on our height, weight, and frame - our unique proportions.) If our body is fixed in this position, then no matter how it's angled to Earth - whether standing upright, leaning, lying, or standing upside down - our center of gravity doesn't change. (Picture the prone, unbending silent movie comic Buster Keaton, quiet and dignified, seemingly gliding through the air as he grasps onto the back of a moving cable car.)

What produces a new  center of gravity is movement of a body segment (say, lifting a leg to give a ball a hard kick). The line of gravity - the action line of the force of gravity on an object - is like a plumb line attached to the center of gravity. Regardless of the orientation of the object on Earth (including its atmosphere), the line of gravity is always vertically downward toward the center of the Earth. 
For an object to be stable, the line of gravity must fall within the object's base of support. The standing human body is stable when its line of gravity falls within its base of support: namely our two feet and the area between them. Stability becomes increasingly precarious as our center of gravity nears the edge or our base. When the line of gravity falls outside our feet, we fall.
In everyday life, of course, we seldom stand rigidly for long. 
We move.
               And we're moved.

Gravity is the most consistent external force encountered by the human body, but there are others: objects that we're wearing, carrying, or using pull on us; strong winds, ocean waves, and other natural elements buffet us about; and people push or pull us. We can increase our stability (give our line of gravity more freedom to move without falling outside its base of support) in response to these external forces by lowering our center of gravity (by bending our knees) and/or by making our base of support larger (by widening our stance or by relying on the support of a cane, a walker, crutches, a ballet barre, or the like), heavier (by performing strengthening exercises for the lower body, including our hips).

The hip joint consists of the ball-like head of the upper leg bone (the femur) and the hip socket (acetabulum) of the pelvic girdle. The pelvic girdle consists of the right and left pelvic bones joined together posteriorly by the sacrum (the triangular bone at the base of the spine) and anteriorly by the pubic bones.

Although favoring stability over mobility, the hip joint is the second most mobile joint (after the shoulder joint) in the body. Routine movement of the hip joint usually involves movement of the pelvic girdle. For example, in walking, hip flexion (lifting the leg forward) is accompanied by pelvic girdle forward rotation (anterior tilt), and hip extension (bringing the leg backward) is accompanied by pelvic girdle backward rotation (posterior tilt).

Weight resistance yogins faithfully strengthen the four major groups of hip muscles: 
1) the flexors, which move the upper leg straight forward and up;
2) the extensors, which move the upper leg straight backward and up;
3) the abductors, which move the upper leg to the side and away from the midline; and 
4) the adductors, which move the upper leg from the side toward the midline.
Most of these muscles also act as external rotators (which rotate the upper leg away from the midline), or internal rotators (which rotate the upper leg toward the midline).    


As we age, we come to consider the importance of having strong and healthy hips. As we've seen, the hips (along with the other segments of the lower body) counteract the pull of gravity and the effect of other forces and allow us to be ambulatory, as well as act as a pillar that supports the trunk and head. But we who practice weight-resistance yoga also recognize hos an embodied practice that includes exercises that strengthen the hips, perhaps especially in their role as stabilizers, can help change our behavior - which means to say, shape the self.

Many of us are ruled by uncontrollable patterns of behavior that make us unhappy. Yet they seem to us to be rational responses to people around us and events out of our control. Put upon, we become irritable and fly off the handle. Feeling slighted, we sulk, nursing the desire to get even. Feeling unappreciated, we constantly seek acknowledgment. When expectations go awry, we lose heart or turn cynical and pessimistic. Our center is unstable. Through working on hip-strengthening exercises, weight-resistance yogins attain a physical stability that over time comes to correspond to an inner stability -- a stability that isn't a steady condition impervious to the world but an engaged response to the world. We embrace others. We seek their embrace. Yet we detach ourselves from their crazy talk. We retain our equanimity. When we're "pushed" and "pulled" by sudden, unforeseen events, large and small, we're not upended. We receive good news and bad news, success and failure equably. We remain calm and undisturbed. Sometimes we teeter. But grounded in the earth (through accommodation with gravity) and yearning for the heavens (through resisting gravity and standing upright), we soon move back to our vital center.


To know is accordingly the ability to stand in the manifestness of things that exist, to endure them. Merely to have information, however abundant, is not to know. -- Martin Heidegger


An Introduction to Metaphysics

Bring a leg back. This movement -- hip extension -- is performed by the large gluteal muscles, which make up the buttocks. Feel your buttocks. Although layered over with fat, the gluteus maximus, which forms most of the muscle of the buttocks, is easily palpable. That's because it originates on the posterior spine and pelvis and inserts on the upper leg. Bring the leg forward and up. This movement -- hip flexion -- is primarily performed by the iliopsoas, which lifts the leg beyond the normal standing position. Moving obliquely from the small of the back through the pelvic bowl to attach at the front upper leg, the iliopsoas, although large, is palpable only in the emaciated or in the thin who relax their abdominal muscles. These two dissimilar and opposing muscles -- the gluteus maximus and iliopsoas -- work together sequentially, sometimes in an alternating rhythm, to perform a variety of motions that require strong anterior/posterior action of the hips. They contract during jumping and leaping. They provide action to propel the body forward when walking up an incline, such as a ramp or a hill. When climbing stairs, while the gluteal muscles work to shift the body's weight over the supporting leg, the iliopsoas works to lift the swinging leg. Both muscles play critical role in running, not only in propelling the body forward but also in stabilizing the body to keep it from pitching over.

Although they aren't strongly contracted during ordinary walking, the gluteal muscles and iliopsoas are strongly brought into play in another common daily activity: standing up from sitting. In general, we prefer sitting to standing. The act of sitting down, especially as we get older, is a a pleasurable activity. It sometimes produces a sigh of relief. We're equipped for sitting. Compared to ape buttocks, human buttocks, human buttocks are quite large. Apes sit on their ishial tuberosities, sitz bones, which protrude through their fur; we're cushioned by prominent rounded buttocks. Aristotle observed: The posterior bottom of the trunk and the parts about the upper legs are peculiar in man as compared with quadrupeds. Nearly all these latter have a tail. But man is tailless. He has, however, fleshy buttocks, which don't exist in quadrupeds. His thighs are also fleshy. There is one explanation: of all animals, man alone stands erect.

Standing causes no fatigue to quadrupeds, and even the long continuance of this posture produces in them no weariness; for they are supported the whole time by four props, which is much as though they were lying down. But for man, it's no easy task to remain for any length of time on his feet; his body demands rest in a sitting position. This, then, is the reason why man has fleshy buttocks and thighs. But sooner or later, stand up we must.

In fact, rising to a standing position from a sitting position is one of the most critical activities of daily life. Just consider early morning before we go out in the world: we get out of bed, get up from the toilet seat, and leave our chair at the kitchen table after breakfast. Rising from a seat involves four phases. In the first phase, to initiate momentum for rising, we lean forward as we fix our upper legs, shifting the center of gravity of the trunk over our feet. In the second phase, in order to transfer momentum to the whole body, as we leave the seat we slightly bend our knees. In the third phase, we begin to straighten the knees, hips, and trunk as the body rises. In the fourth phase, we stabilize the body in the full upright position. The first and second phases recruit the iliopsoas; the third phase, the gluteal muscles; and the fourth phase, both. If we think about the mechanics of rising at all, it's probably because our ability to stand (or the ability of someone close to us) has been impaired or even lost.

During the weight resistance yoga session, when we reflect on what it means to be human, we consider how standing up is a critical aspect not only of our daily life and the evolutionary development of our species but also the biological development of the individual. In first standing up without support, the child has no concern for security. Failure -- falling down -- doesn't discourage the child one bit. The forceful urge to get up, to resist downward-pulling forces -- while in a state of precarious balance! -- overcomes any fear.

"In getting up," observes German phenomenological psychologist Irwin W. Straus, a child "gains his standing in the world. The parents are not the only ones who greet the child's progress with joy. The child enjoys no less the triumph of his achievement." There's no need for parental attention, yet applause. Fitness trainers regularly use the parenting model of "providing positive feedback" with their clients. This training philosophy of "bolstering self-esteem" fosters an inappropriate relationship: come semblance of parent/child and even lover/beloved or sadist/masochist.

In contrast, yoga teachers, including weight-resistance yoga teachers, don't shore up self-esteem and provide positive reinforcement. They don't get caught up in praise (and its implicit threat: the withdrawal of praise -- which means to say, blame. They don't provide motivation by cajoling, scolding, or goading students. They don't chitchat; there's too much to attend to. They simply demonstrate correct form to students and then correct students' form by making adjustments, thereby aiding students in moving deeper into an exercise. [Sounds a lot like a good weightlifting coach, don't it.] Of course, weight-resistance yoga teachers do much else. They set a tone -- from mindful to motivational -- for the session. They help us recognize how our movements reveal our habitual thoughts, emotions, and attitudes, so we can discard those that interfere with our spiritual path. They aid us in becoming fully absorbed in our movements as a means of accessing realities beyond everyday life. But no matter how much they guide us, we always know that it's through our own self-discipline that our life is transformed and that it's only we -- in part through our reverent and upright posture -- who can open ourselves up to the ground of Being.


In yoga we do well to avoid too much of the idea that we are bound to the earth, even physically. The earth pulls us towards it by gravity, but we also pull it upwards to us, also by gravity. We thus have a share of the original power, and when walking . . . we do to some extent float. -- Ernest Wood.

Between five and six million years ago, a new type of primate evolved in Eastern Africa -- one that walked on two legs instead of ambling along on all fours with its front knuckles to the ground. Bipedalism was literally the first evolutionary step that divided hominids from apes. To develop the ability to walk upright, the anatomy or our ancestors underwent complex changes that shifted the upper body over the pelvis and the lower body more directly under the pelvis. (Recent research has shown that some aspects of human anatomy may have evolved in order to accommodate running, not walking.) Among the changes that took place was the angling inward toward the body's midline of the thighbone (femur) as it slopes toward the knee. In apes, the femur runs straight down from hip to knee, which accounts for their boxy, side-to-side, swaying gait. Humans are wider in the hips than through the knees, which improves our balance. As is our want, we've used this mechanical advantage to individualize our gait.

As you walk down a sidewalk in a shopping area in springtime, notice how the sway of people's hips varies, depending on their frame, age, speed, and mood, as well as their status and personality. As Mabel E. Todd, one of the pioneers of bodywork [specifically Ideokinesis], observed in 1937: "Watch any man as he walks down the avenue, and you can determine his status in life. With practice, a finer discernment will have him placed socially and economically, and with a fair idea of his outlook on life."


A classic study of physiology and the effect of psychological processes on movement that has a
mind/body approach.

"The ability to improve a pattern of support and movement for the reduction of stresses comes, not through the development of bulk and power in individual muscles, but from the study and appreciation of the human body as a weight-bearing and weight-moving structure." (Page 33)

Bookfinder:


Even those of us with little discernment of body language have noticed (if only in some vague way) that a person's gait is expressive of his or her emotional make-up. A genial disposition, a touchy temperament, strong or weak character, a pinched or expansive personality, meek or overbearing behavior are all, we'd agree, expressed in gait. But whatever a person's unique gait, the mechanics of his or her walking are the same. Walking consists of a swing phase and a support phase. Slip behind a woman wearing tight jeans and take a dispassionate look, if possible, at the changes in the position of her hips made with each step. (Because women's hips are generally wider than men's, a woman's gait is more pronounced, making it a more advantageous subject of study.) Note that when her right leg lifts off the ground, during the beginning of the swing phase, she's standing on her left leg. The right side of her pelvis is unsupported, leaving her vulnerable to tipping over to the right. What keeps her from falling over?

During the swing phase, the abductors (the group of hip muscles that attach to the upper, outside part of the leg) of the supporting (left) leg contract to oppose the tendency of the pelvis to drop on the unsupported (right side). At the same time, the adductors (the group of hip muscles that attach to the leg on the inside of the thigh) of the swinging leg contracts to shift the pelvis over, moving the upper body weight over the supporting left leg. The right leg lifts (bends at the knee) and then straightens (extends at the knee). The swing phase ends as the heel of the right foot is placed on the ground. When the whole foot is placed flat on the ground, the hip adductors and abductors of both legs stabilize the pelvis. This support ends when the heel of the trailing (left) leg is raised in push off. 

While not an act of derring-do, like that of a tightrope walker crossing a high wire, this simple act of walking on the ground is, when you think about it, an amazing balancing act all the same. A rhythmical movement in which he center of gravity is swung forward, human bipedal gait places us in peril at every step. As we've seen, the whole weight of the body rests for a short time on only one leg, destabilizing the body, thereby putting us at risk of falling -- until the leg brought forward reaches the ground, once again rescuing us from the threatened fall. 

As phenomenological psychologist Erwin W. Straus observed: "Human gait is, in fact, a continuously arrested falling." For this reason, it can be said that walking is an assumptive act: upon taking a step, we take for granted that the leg brought forward will ultimately find solid ground, and that we won't fall. We might trip over an unseen obstacle or unevenness of ground. Somebody might knock us over. Our weak or frail bones might precipitate a collapse. But, by and large, we're not anxious when we walk. Most of the time, our experience of walking is pedestrian: we move from Point A to Point B without any worries. Which is all the more reason to keep the hip joints strong and healthy. 

A marvel of locomotive engineering, the hips lose their effectiveness as we age. By strengthening the hip muscles -- in particular, the two hip abductors, the gluteus medius and gluteus minimus, we can to a great degree retain the spring of youth in our step. This strengthening will allow us to continue putting one leg in front of the other to ambulate without giving a thought to it.

Not that attentiveness to walking is a bad thing. Hatha yoga praises the body -- not so that we can display it as a proud possession [after all is said and done you only rent the thing anyhow], but so that we can move with steadiness, ease, and strength when needed. Without a fit and healthy body we cannot know bliss. But the physical conditioning aspect doesn't benefit only the periods set aside from everyday life for achieving altered states or for enjoying the self-induced efforts of training; it also makes possible transportive experiences during everyday life, such as walking down a street, perhaps on one of those days when it's lightly raining and the fragrance of trees is strong. As we effortlessly stroll along, we turn our attention to our stride: the swing phase and the stability phase feel so secure and coordinated and elegant, they seem to be acting through us. By this I mean that we can identify the doer. We don't make decisions about taking steps. They just happen. "We" are no more doing the walking than "it" is raining. There's no will to move or submission to being moved. There's just serenely complete walking.

And wouldn't it be something to apply that to your lifting.      


Saturday, November 14, 2015

Strongman-Style Training With Conventional Equipment - Rob Orlando (2015)


Muscle & Performance is a monthly magazine aimed at active men and women who are highly motivated in the quest to improve their bodies and their health. It offers a wealth of workouts, diets, supplementation strategies and advice for gaining muscle mass, getting stronger, losing weight and enhancing sports performance.


Rob Orlando opened Hybrid Athletics in 2008 because he wanted to share his passion for exercise and strongman movements with the local population. Rob is a competitive strongman and Crossfit athlete. He's won 6 consecutive strongman contests while placing 22nd and 15th at the 2009 and 2010 CrossFit Games respectively. Rob's drive is to re-introduce natural movement patterns to the fitness community. Strongman implements represent the most basic, innate movements known to man including pushing, pulling, pressing, flipping, dragging, and carrying.


6-WEEK STRONGMAN CRUCIBLE
by 
Rob Orlando

If you've always wanted to try strongman training but don't have access to massive tractor tires, kegs, the log, and Atlas stones, you're in luck: This program may be the perfect introduction to building strength like a strongman inside your regular gym.


Strongman competition demands fringe, high-level strength like that of powerlifting, yet with a capacity that extends beyond the single, max-effort rep and into grueling efforts as long as 60 to 90 seconds of pure power output. But don't flip ahead to the next article yet; it just so happens that the gamesmanship and increased degree of variability make strongman a viable training approach for anyone.

For the next six weeks, this program will not only promote clear, measurable strength gains but also add intensity and variety to a humdrum routine. First, you'll set a baseline of performance with two events: an Upper-Body effort and a Lower-Body effort. Come Week Six, you'll set new personal bests in both.


Upper Baseline

In traditional strongman fashion, the upper-body baseline strength event is a 60-second, max-rep Alternating Circus Dumbbell Press. You'll need to shoulder and press a heavy dumbbell for max reps in 60 seconds, successfully securing those reps by alternating sides. Although the dumbbells in most conventional gyms aren't as large as a circus dumbbell and have smaller handles, they'll suffice to this baseline. Choose a weight you can press three or more times in 60 seconds. The heavier the dumbbell, the better it will be to test strength and performance improvements.

However, strength doesn't always mean conventional starts and finishes. It should be noted that the term "press" in strongman includes all methods of pressing, including the push press and jerk techniques. All methods of shoulder-to-overhead are acceptable here.


Lower Baseline

 The lower-body baseline strength event is a 60-second, max-rep 18-inch deadlift. To achieve that range of motion, you should pull from four-inch blocks. Using plates is a helpful modification as long as their height puts the bar roughly four inches off the floor and you use the same plates for your final effort. Choose a weight you can typically pull for five or more reps in 60 seconds.


Diversity and Acceptability

Our six-week training program will demand strength adaptation via some tried-and-true strongman elements without requiring all the specific strongman tools you won't find in most gyms. Expect to see a max-effort upper- and lower-body day each week, as well as a dynamic, or speed-focused upper and lower day each week. To get stronger you need to produce force faster, so let speed be your guide on dynamic effort days. The most common mistake on speed days is to choose a load that you can't move fast enough, which prevents the central nervous system from recruiting more motor units for these movements. Here, go a bit lighter to get more out of each exercise.

In addition to the primary move, each day will include assistance work. These mostly conventional movements can be loaded as heavy as possible as long as you can complete the prescribed number of reps with quality form. Lower-body days wil comprise familiar exercises to support lumbar strength, glutes and hamstrings. On upper-body days, the assistance work will build a support system for an incredible press by developing the upper back and triceps.

Each day will also include a short but intense conditioning session. Remember, the sport of strongman involves slightly more athleticism and strength endurance than say, powerlifting, which is more of a single-effort activity. For strongman-type strength and stamina, 60 seconds is the eternity you'll need to train for.

Each day will conclude with a high-rep finisher that often comes in sets of 100 reps. To improve your performance over these six weeks, recovery will be critical, and these finishers use lighter weight in order to flood the working area with blood and nutrients. Choose a weight with which you could do 100 unbroken reps. If you fail before 100, complete the remaining reps in as few sets as possible and with as little rest as possible in between. If you can hit 100 without resting, add weight next time.


Primal Athleticism

Strongmen are pros at building heaps of well-conditioned muscle. Performing unconventional moves, training strength endurance and building freaky grip strength all contribute to the kind of primal athleticism that anyone can benefit from

If you've always wanted to try strongman training but don't have access to massive tractor tires, kegs, the log, and Atlas stones, you're in luck: This program may be the perfect introduction to building strength like a strongman inside your regular gym.


Workout Notes

1) For all assistance exercises, rest 60 to 90 seconds between sets. For all core exercises, limit rest to 60 seconds or less.

2) For all sets of 100 reps, if you fail before 100, rest 10 to 15 seconds before continuing the set. Repeat as necessary to reach 100 total reps.

3) If you can hold a plank for longer than the time prescribed, use a weighted vest/backpack or have your partner add plates to your back surgically.

4) To find your one-rep maxes (1RM) on certain exercises, after a warm-up, simply work up to the heaviest single rep that you can complete in good form. Take as many sets as necessary to find your 1RM and rest as long as 3 to 5 minutes between sets.

5) Each week features four workouts, designed to follow a Monday/Tuesday/Thursday/Friday schedule. Feel free to adjust as necessary based on your own schedule and rate of recovery.


Week One

Day 1

Baseline Test  -
Circus Dumbbell Press, 1 set, 60 seconds.
 - Clean the dumbbell to shoulder level, press (see note above about 'pressing'), then return it to the floor and repeat on the other side. Alternate reps for 60 seconds and log your total.


Assistance Work -
Barbell Z-Press, 3 set of 8 reps.
 Set up the pins in a power rack anywhere from clavicle to chin height. Perform overhead presses while seated on the ground, legs out wide in front of you. The Z-Press addresses postural muscles in a more challenging (and likely unfamiliar) way. Start lighter on this move to get a feel for it. Focus on maintaining straight legs and a rigid core as you press forcefully overhead.

One-Arm Dumbbell row, 3 x 10 (each side)

Core Work
Barbell Rollout, 3 x 8
Plank, 3 x 60 seconds

Conditioning -
Every minute on the minute (EMOM) for 12 minutes:
Odd minutes - Plyometric Pushup x 6
The plyometric pushup activates the powerful fast-twitch muscle fibers in your chest, shoulders and triceps. This dynamic, max-effort activity holds tremendous carryover for those who are serious about building pressing strength. You can perform these on flat ground or alternating between higher and lower hand heights.  
Even minutes - Kettlebell Swing x 12
 - Use the heaviest kettlebell that you can handle effectively for 12-15 reps.

Finisher
Lying Triceps Extension, 1 x 100 (see note above on 100 rep sets)


Day 2

Baseline Test
18-inch Deadlift, 1 set, 60 seconds.
 - Set up the barbell so the plates rest on blocks that are four inches in height. Select a weight with which you can complete five or more reps in 60 seconds. Use straps if necessary to maintain your grip for the full minute.

Assistance Work -
Romanian Deadlift, 3 x 8 reps
Back Extension (hypers), 3 x 12

Core Work -
Dumbbell Windmill, 3 x 5 reps (each side)
 - Standing with your feet placed wider than your hips, raise the dumbbell overhead and lock your arm in this position. Bend over to touch the floor between your feet or your same-side foot with your opposite hand (the one without the dumbbell), then contract your glutes, hamstrings and lower back to return the dumbbell back to the start position. Complete all reps for one side before switching and keep your eye on the dumbbell overhead at all times.

Conditioning -
Work for 60 seconds, then rest three minutes. Do five rounds. 
 - Farmer's Walk (100 feet, 50 feet each way)
 - Barbell Front Squat, to failure
For this conditioning circuit, grab a set of heavy dumbbells and walk 50 feet out and 50 feet back, then perform max reps of the front squat with about 70% of your 1RM. Rest three minutes after the squats. Your score is your front squat total for all three rounds.


Day 3

Dynamic Work: Upper Body -
Speed Bench Press, 10 sets of 3 reps.
 - Sets begin every 60 seconds with maximum bar speed. Load the bar with approximately 55% of your 1RM and focus on moving the bar as quickly as possible, under control.

Assistance Work -
Pullup, 3 x 8
Barbell Row, 3 x 8
If you can do more than 8 reps in the pullup, add weight. No, not bodyweight, you inconsequential speck non-transcendent flesh.

Core Work -
Dumbbell Russian Twist, 3 x 20 each side.
 - Look this one up if unfamiliar.
Kneeling Cable Crunch, 3 x 12.

Conditioning -
EMOM for 12 minutes:
Odd Minutes - Plyometric Pushup x 6
Even Minutes - Kettlebell Swing x 12 (see above for notes on both)


Day 4

Dynamic Work: Lower Body -
Barbell Squat, 12 sets of 2
 - Sets begin every 45 seconds with maximum bar speed. Load the bar with approximately 65% or your 1RM.
Sumo Deadlift, 8 sets of 1 rep
 - Sets begin every 30 seconds with maximum bar speed. Load the bar with approximately 70% of your 1RM.

Assistance Work -
Pause Squat, 3 x 5 reps
 - Calling for a deliberate pause at the bottom of each squat rep, this lift forces you to generate as much force as possible on the positive portion of the rep. It eliminates the benefit of elasticity, which works in your favor as you work on gaining appreciable amounts of strength. You'll have to use less weight than you would on typical working sets of the back squat. This technique can be employed on any squat variation (front, sumo, etc.).

Core Work -
Weighted Situp, 3 x 10

Conditioning -
As many rounds as possible (AMRAP) in 10 minutes:
 - Alternating Dumbbell Step-up, 10 (each side)
 - Plate Push (50 feet, 25 each way)
Who needs a sled? If you have a heavy weight plate (45 lbs. will suffice) and some flat terrain, you can reap many of the same strength and conditioning benefits. Press forward as quickly and aggressively as you can for the prescribed distance or time.

Finisher -
Glute Bridge, 1 x 100 (see note above on 100-rep sets).


Week Two


Day 1

Max Effort: Upper Body -
Find 1RM Floor Press
While there are multiple documented "expert" programs for finding your single-rep max, we believe it is a very personal process. While some guys can simply walk into the gym in street clothes and bang out a new max on their first rep of the day, we advise a more detailed methodology. Follow your 5 to 10 minute general warmup with some specific warmup sets of the exercise being tested to mentally and physically pattern the movement while also increasing blood flow to participating muscle groups. Adding weight each set and taking as much rest as you feel is necessary, work your way toward your 1RM in as few sets as possible to avoid spending precious energy ahead of the test. Repeat the single-rep attempt, if necessary. Log your highest successful attempt.

Assistance Work -
Chest Dip, 3 x 8 reps.
 - If you can do more than 8 reps, add weight.
Close-Grip Pushup, 3 x failure.

Core Work -
Barbell Rollout, 3 x 10.
Plank, 3 x 60 seconds (see note above on plank times).

Conditioning -
Dumbbell Push Press, 1 x 60 total reps.
Pullup x 5 reps.
 - Use a weight that you can handle for 10-12 reps on your first work segment. Perform five pullups every time you hit momentary muscular failure.

Finisher -
Barbell Row, 1 x 100 reps (see note above on 100-rep sets).


Day 2

Max Effort: Lower Body -
Find 1RM Barbell Squat (see note above on finding 1RM).

Assistance Work -
2-inch Deficit Deadlift, 3 x 10.
 - It can be argued that the only thing better for pure strength than a deadlift is a longer deadlift. This variation provides you with a stronger start on the standard or elevated deadlift because you're working the same muscles through a longer range of motion.
Back Extension (hyper), 3 x 12 reps.

Core Work -
Dumbbell Side Bend, 3 x 12 (each side).
Situp, 3 x 20.

Conditioning -
EMOM for 12 minutes -
Odd Minutes: Weight Plate Pinch, 20 seconds
Even Minutes: Barbell Walking Lunge: 4 (each side)

Finisher -
Barbell Good Morning, 1 x 100 total reps.


Day 3

Dynamic Work: Upper Body -
Speed Bench Press, 10 x 3 reps.

Assistance Work -
Triceps Pressdown, 3 x 8 reps.
One-Arm Dumbbell Row, 3 x 10 (each side).

Core Work -
Dumbbell Windmill, 3 x 6 (each side)

Conditioning -
AMRAP in eight minutes, using a 1-2-3-4-5-6-7 protocol:
Circus Dumbbell Press, first set 1 rep, then 2 reps, etc. to 7 reps (baseline weight each set)
Pullup, same protocol.

Finisher -
Face Pull, 1 x 100 total reps.


Day 4

Dynamic Work: Lower Body -
Barbell Squat, 12 x 2 reps.
Sumo Deadlift, 8 x 1 rep.
 - same method as Week One, Day 4.

Assistance Work -
Circus Dumbbell Press, 3 x 8 (each side).
Romanian Deadlift, 3 x 8 reps.

Core Work -
Barbell Rollout, 3 x 12 reps.

Conditioning -
Work for 30 seconds, then rest 90 seconds. Do five rounds:
Kettlebell Swing, 3 x 30 seconds.

Finisher -
Stiff-Legged Sumo Deadlift, 1 x 100 total reps.


Week Three

Day 1

Max Effort: Upper Body -
Find 1RM Barbell Push Press.

Assistance Work -
One-Arm Dumbbell Overhead Press, 3 x 8 (each side).
Lying Triceps Extension, 3 x 10.

Core Work -
Plank, 3 x 60 seconds.

Conditioning -
For time (use time as the measure), using a 10-8-6-4-2 protocol
Dumbbell Renegade Row
Plyometric Pushup
Pullup

Finisher -
Incline Bench T-Raise, 3 x 30
Incline Bench Y-Raise, 3 x 30


Day 2

Max Effort: Lower Body -

Find 1RM Deadlift

Assistance Work -
Pause Squat, 3 x 5
Back Extension, 3 x 12

Core Work -
Barbell Rollout

Conditioning -
Rest 30 seconds between exercises and 60 seconds between rounds. Do three rounds.
Max Distance Farmer's Walk, 30 seconds
Max Sumo Deadlift (~ 60% 1RM), 30 seconds

Finisher -
Barbell Good Morning, 1 x 100 total reps.


Day 3

Dynamic Work: Upper Body -
Speed Bench Press, 10 sets of 3

Assistance Work -
Barbell Push Press, 3 x 8 reps
One-Arm Dumbbell Row, 3 x 8 (each side)

Core Work -
Dumbbell Windmill, 3 x 8 (each side)

Conditioning -
AMRAP in six minutes:
Inverted Row, 9
Kettlebell Swing, 12
Dumbbell Russian Twist, 15 (each side)

Finisher -
Barbell Row, 1 x 100 total reps.


Day 4

Dynamic Work: Lower Body
Barbell Squat, 12 sets of 2
 - Sets begin every 45 seconds, with maximum bar speed. Use approximately 75% of 1RM
Sumo Deadlift, 8 sets of 1

Assistance Work -
Stiff-Legged Deadlift, 3 x 8 reps
Barbell Glute Bridge, 3 x 10 reps

Core Work -
Weighted Situp, 3 x 12

Conditioning -
Work for 60 seconds, then rest two minutes. Do four rounds:
Plate Push (30 feet, 15 each way)
Front Squat (~60% 1RM), Max Reps

Finisher -
Back Extension, 1 x 100 total reps


Week Four 

 Day 1

Max Effort: Upper Body -
Find 1RM Decline Bench Press

Assistance Work
Pullup, 3 x failure
Dumbbell Floor Press, 3 x 10

Core Work - 
Kneeling Cable Crunch, 3 x 10
Plank, 3 x 60 seconds

Conditioning
EMOM for 10 minutes:
Circus Dumbbell Press, 20 seconds

Finisher
Face Pull, 1 x 100 total reps


Day 2

Max Effort: Lower Body
Find 1 RM Sumo Deadlift from 4" Blocks

Assistance Work
One-Leg Dumbbell Deadlift, 3 x 8 (each side)
Alternating Dumbbell Step-Up, 3 x 10 (each side)

Core Work - 
Dumbbell Windmill, 3 x 8 (each side)

Conditioning
AMRAP in nine minutes:
Alternating Barbell Lunge, 6 (each side)
Dumbbell Overhead Press, 9

Finisher
Barbell Good Morning, 1 x 100 total reps 


Day 3

Dynamic Work: Upper Body
Speed Bench Press, 10 sets of 3

Assistance Work
Chest Dip, 3 x 8
Inverted Row, 3 x 12

Core Work
Dumbbell Side Bend, 3 x 12 (each side)

Conditioning
Work for 60 seconds, then rest three minutes. Do four rounds:
Barbell Overhead Press, 60 seconds

Finisher
Incline Bench Rear Lateral Raise, 1 x 100 total reps 


Day 4

Dynamic Work: Lower Body
Barbell Front Squat, 12 sets of 2 reps
Sumo Deadlift, 8 sets of 1 rep

Assistance Work - 
Stiff-Legged Sumo Deadlift, 3 x 8
Back Extension, 3 x 12

Core Work - 
Plate Russian Twist, 4 x 20 (each side)

Conditioning
EMOM for 15 minutes:
Minute 1: Plate Push (30 feet, 15 feet each way)
Minute 2: Kettlebell Swing, 12
Minute 3: Barbell Jump Squat

Finisher
Barbell Glute Bridge, 1 x 100 total reps


Week Five

Day 1

Max Effort: Upper Body
Find 1RM Pause Bench Press

Assistance Work
Barbell Row, 3 x 10
Triceps Pressdown, 3 x 12

Core Work
Weighted Situp, 3 x 12
Plate Russian Twist, 3 x 30 (each side) 

Conditioning
AMRAP in nine minutes, using a 1-2-3-4-5-6-7-8-9 protocol:
Bench Press (~ 60% 1RM)
Pullup

Finisher
Face Pull, 1 x 100 total reps


Day 2   

Max Effort: Lower Body
Find 1RM Zercher Squat
Even those who are impressed with their current squat would be humbled by this exercise. To perform the Zercher correctly, hold the barbell in the crook of your elbows, maintain a rigid upper body and squat as normal, resisting the inevitable forward that the barbell placement involves.

Assistance Work
4" Deficit Deadlift, 3 x 8 reps
Back Extension, 3 x 12

Core Work
Kneeling Cable Crunch, 3 x 10 reps 
Plank, 3 x 75 seconds

Conditioning
Do each exercise, then rest two minutes. Do six rounds:
Farmer's Walk (100 feet, 50 feet each way)
Kettlebell Swing, to failure

Finisher -
Barbell Glute Bridge, 1 x 100 total reps


Day 3

Dynamic Work
Speed Bench Press, 10 sets of 3 reps

Assistance Work
Lying Triceps Extension, 3 x 10
Close-Grip Pushup, 3 x failure

Core Work -  
Barbell Rollout, 3 x 12

Conditioning -
Rest 30 seconds between exercises and 60 seconds between rounds. Do three rounds.
Renegade Row, 30 seconds
Plate Russian Twist, 30 seconds

Finisher -
One-Arm Dumbbell Row, 2 x 50 total reps (each arm)


Day 4

Dynamic Work: Lower Body
Barbell Front Squat, 12 sets of 2 reps
 - Sets begin every 45 seconds with maximum bar speed. Load the bar with approximately 70% of 1RM
Sumo Deadlift, 8 sets of 1

Assistance Work -
Barbell Glute Bridge, 3 x 8 reps
Kettlebell Swing, 3 x 20 reps

Core Work -
Plate Russian Twist , 4 x 20 reps (each side)

Conditioning -
Do eight rounds for time, resting one minute between rounds. Strive to complete each round in the same time as your first round:
Plate Push, 30 feet, 15 feet each way
Plyometric Pushup, 5
Deadlift (~75% 1RM), 3

Finisher -
Barbell Good Morning, 1 x 100 total reps


Week Six

Day 1

Baseline Test -
Circus Dumbbell Press, 1 x 60 seconds.
18" Deadlift, 1 x 60 seconds.
 - See Week One, Day 1 and Day 2 and check your progress. 


Wednesday, November 11, 2015

Squats or Leg Extensions? - Steve Holman (1994)


Squats or Leg Extensions?
(Positions of Flexion)
by 
Steve Holman (1994)


Question: If muscle isolation is so important for growth, as so many experts claim, doesn't that make the leg extension a superior quadriceps exercise to the squat? 

You can't really compare leg extensions and squats, because they affect the quads differently. It's like asking whether E or C is the superior vitamin -- you need both of them.

Squats, a mid-range movement in Positions of Flexion training -- 

-- [The mid-range position movement works the target muscle with synergy, or help from other muscle groups, so you can train it with maximum poundage. A mid-range movement doesn't take the target muscle to full stretch or complete contraction, however. Example: Squats for the quadriceps.

The stretch position movement puts the target muscle into an overextended state so you can take advantage of the pre-stretch reflex. With a quick twitch at the point of stretch you can involve more muscle fibers due to better neurological stimulation. Example: Sissy Squats for the quadriceps.

The contracted position exercise trains the target muscle with resistance at the point of complete contraction as well as through the full range of motion.] --

So, squats, a mid-range movement, train your quads with synergy, or help from other muscles including your glutes and erectors, which allows you to use heavy poundages. Leg extensions, on the other hand, are a contracted position movement for the quads; that is, your quads are in position to contract completely, and there's resistance at that contracted point in the range of motion. While it's true that leg extensions isolate the front thigh muscles to a great degree, they are a single joint exercise, and so you can't use as much weight as you can on a multi-joint movement like the squat. Nevertheless, leg extensions are necessary for more complete quad development.

Jerry Robinson, author of The Optimum Workout columns, discussed single joint movements and the fact that "development seems to occur at the end of the muscle that's closer to the movement." This means that leg extensions tend to have the potential to give you more size down near your knees, which may be due to the peak contraction effect, or top end resistance, that they deliver and squats lack. If you've ever read thigh training articles from the '60s and '70s, you may have noticed that the champs from that era often said that leg extensions gave them more definition in their quads. This was a somewhat inaccurate observation, however, and may well have been a reference to what was actually low-quad development. This buildup in the quads near the knees may have made it appear as if their definition was increasing, but, in fact, it was probably just added mass from the leg extensions making the teardrop shapes more pronounced.

Squats don't have a peak contraction effect, but because of muscle teamwork most people can eventually build up to tremendous poundages on them. This makes them perfect for packing on more overall thigh mass.

To get back to the original question, however, if you're asking about which one of these exercises you should choose if you can only do one, the answer depends on your development. If you're a beginner to advanced intermediate, stick with squats so that you'll continue to put on overall quad size. If you're more advanced, leg extensions are a must during certain phases of your training.

If you can afford to do more than one quad exercise and you're a sufficiently advanced trainee, then you should train your quads in all three positions of flexion for the most complete development possible in your front thigh muscles. This means that you should incorporate squats for the mid-range position movement, leg extensions for the contracted position movement, and sissy squats for the stretch position movement.

I've already touched on the mid-range and contracted positions with squats and leg extensions, respectively. The stretch position is also important because it allows you to use the myotatic (pre-stretch) reflex to involve more muscle fibers. This reflex is a myosynaptic reflex, which provides automatic regulation of skeletal muscle length. With a quick "twitch" at the bottom of a stretch position movement like sissy squats, you can get a more powerful contraction in the target muscles. Baseball players often use the pre-stretch reflex before they swing, flicking the bat back before moving it forward to get more power. The same principle is why stretch-position movements allow for such a strong contraction. 

Here's an example of how to implement all three positions of flexion in a quad routine:

*One second positive and three second negative, slower cadence and more controlled turnaround in the stretch position exercise. Take all sets to at least positive failure. 

Mid-range position: Squats, 2 x 8-10 reps
Stretch position: Sissy Squats, 2 x 8-10
Contracted position: Leg Extensions, 2 x 8-10

Remember, because you're working your quads completely and thoroughly with this routine and you are going to at least positive failure on all your work sets, it won't take many sets to completely fatigue your quads. Two sets per position is all that's required.


Tuesday, November 10, 2015

11/11/11


To His Love

He’s gone, and all our plans
Are useless indeed.
We’ll walk no more on Cotswolds
Where the sheep feed
Quietly and take no heed.

His body that was so quick
Is not as you
Knew it, on Severn River
Under the blue
Driving our small boat through.

You would not know him now . . .
But still he died
Nobly, so cover him over
With violets of pride
Purple from Severn side.

Cover him, cover him soon!
And with thick-set
Masses of memoried flowers -
Hide that red wet
Thing I must somehow forget.

- Ivor Gurney


Saturday, November 7, 2015

Novice Powerlifting Training - Dan Wathen


For some of Dan Wathen's writing on periodization, see here:


Powerlifting is the most popular strength sport in the United States. It's popularity derived from the ease of performance of its movements and the application of basic powerlifting lifts in training for athletics and general fitness.

Most weight trainees, regardless of their inclinations, have performed the Squat, Bench Press, and Deadlift at one time as part of their training routines. The problem facing most novice trainees who decide to specialize in the powerlifts is how to embark on a training schedule that will allow them to make progress quickly and safely. Many elite powerlifters have meteoric rises to prominence and abrupt retirements due to injury. The careers of powerlifters seem to be dictated by the amount and severity of their injuries.

One of the most important considerations for the novice lifter is technique. In analyzing the top performers, we see a variety of styles in all lifts. In the Squat, some favor a wide stance --


-- while others prefer a more conventional shoulder width space often bordering on Olympic style --


Larry Pacifico, Anthony Ditillo and Dave Shaw have advocated the performance of the Olympic style squat early in the training of a powerlifter. In my coaching experience, I find this to be sound advice as the novice may not be able to adjust to the wide stance, bar low on the back style until a solid foundation is developed. It is easier to change to the Power Squat from the Olympic Squat and easier for the for the coach to instruct and for trainees to learn.


With the Bench Press, hand spacing is always a problem. Again, you find top benchers using a wide grip style --


- and moderate to close grip styles -- 


-- with equal effectiveness. From an injury standpoint, the wide grip tends to cause the most problems in this area, although careful warmup seems to be a key in preventing this and most other powerlifting injuries. I would recommend the moderate (medium) grip for novices, who can experiment with grip changes after a few months of training to find out which style is more productive. Louie Simmons trains alternating close and wide grip sessions with great success.

With the Bench Press as well a foundation needs to be laid before the trainee advances to experimenting with varying styles.

The Deadlift also has two schools, the sumo --


-- the traditional (regular) style --


Body structure will dictate the deadlift style most efficient for the individual, as it will in the other two powerlifts. A good foundation  is essential, but I have found that most individuals will gravitate to their best style through a trial and error system. It is up to the coach to point out and analyze body structures and style considerations for each individual. 

Proper form is of the utmost importance to the novice. Many injuries and long periods of unproductive training are often the result of a novice attempting maximum weights before the correct neuromuscular pathway is developed. 

ADDING WEIGHT TO THE LIFTS IS EASIER AFTER PROPER TECHNIQUE IS FORMED,
NOT BEFORE. 

This brings us to the next essential factor, which is proper technique through coaching. Any aspiring novice would find it well worth his time in terms of style development to seek out a good coaching influence. There are good coaches in every corner of the country. There may be someone experienced in your own gym who is willing to help you, and if not, a periodic trip to another locale with a competent coaching influence can save you years of almost unproductive training. 


Routines are a bit more cut and dried. Much study has been devoted to the best scheme of sets and reps to build powerlifting strength. It has been determined through both scientific and empirical investigation that, to build strength, sets from 3 to 5 and reps from 2 to 8 are the most effective. Loads must be maximum or near maximum (above 95%) once per week and around 70% two other days per week when seeking strength gains. The following is a sample routine that has been used by novice lifters with outstanding results.


Train Monday, Wednesday, Friday (or any three alternating days per week)


Day One:

5 sets of 8, 6, 4, 2, 2, working up to 95% of one-rep max. Example - 
Your one-rep max is 300 lbs. You would progress with 165 x 8, 215 x 6, 250 x 4, 275 x 2, and finally 285-290 x 2.

Day Two:

2 sets of 8 reps at 70% of one-rep max, after warmup set. Example - 
Again, 300 lb one-rep max. 165 x 8, 210 x 8. 


Day Three:

3 sets of 5 working at 80% of one-rep max, after two warmup sets. Example - 
165 x 5, 205 x 5, 240 x 3 sets of 5.


This method of training has been found to be as productive for strength gains as lifting near max all three training days of the week, and with far less chance of injury. Each lift can be worked in the same manner. Novices may find that they can work all three lifts in the same day with this scheme without undue fatigue or injury for some months.

Beyond this point, an intermediate program may need to be established to work on the weak points of a lift or lifts. Cycling and supplementary exercises may be introduced at this time. No routine, no matter how good, can be sustained forever, however. Change is necessary to impose new demands on the body so that constant overload can be maintained in some fashion. If new and greater demands are not made, strength will not increase. 

Lifting gear is a matter of great controversy. My recommendations are to purchase a good pair of leather training shoes or boots and a solid lifting belt. The 4-inch all the way around type gives excellent support to all phases of the viscera. Shoes are a matter of preference, but good quality leather will give support needed for heavy squatting.

I lump super wraps, suits, stimulants and steroids in a package of artificial lifting aids. 

In summary, the novice should attempt to find a proper coaching influence, develop a strong lifting background by strict exercise performance in the three powerlifts (if you squat high in training, you will squat high at meets), keep his workout sessions below 90 minutes (this means keep the supplementary exercises like curls, etc. to a minimum), do not rely on 'artificial aids' at least until you reach Class 1 status, and develop appropriate nutritional and rest practices. 

Go Get 'Em!


Monday, November 2, 2015

Triple Threat Chest Training - Bill McArdle, Freddy Ortiz, Arnold - Gene Mozee (1994)


There's an old saying that goes, "There's more than one way to skin a cat, and it certainly holds true for bodybuilding. In the art, sport, and science of building and refining muscle, there are many different methods -- that is, exercise routines -- that you can use to reach your optimum development.

Keep in mind, however, that the lifters who prefer the "10 sets of 10 reps and 10 Dianabol" approach don't build healthy, lasting muscle. They stop working out for two weeks, and lose 15 to 20 pounds.

The following chest training programs, on the other hand, are surefire result producers. They are the workouts used by three great bodybuilders -- Mr. Western America Bill McArdle, IFBB Mr. America Freddy Ortiz, and seven-time Mr. Olympia Arnold Schwarzenegger. These men all had very different bone structures, temperaments and metabolisms, yet each developed a fantastic chest -- a perfect combination of size, shape, and cuts, with a deep rib cage and fully developed pecs. In fact, these champions sculpted such magnificent upper bodies that even the great statues of the ancient Greek gods pale in comparison.

If you've reached the intermediate stage of training or further, you're ready to start specializing too. One of these three routines may well be just what you need to achieve your goal.


Bill McArdle
The Uncrowned Mr. America


Those of you who weren't involved in bodybuilding in the 1960s probably never heard of Bill McArdle. He first came to Southern California in 1965 and trained at Vince's Gym in Studio City, where he became close friends and then training partners with Larry Scott. Bill weighed 225 pounds and had a 52 inch chest at that time, but he won most of his titles at a bodyweight of 208. He possessed one of the most symmetrical physiques of all time -- sort of a Frank Zane type with 25 pounds more muscle and dazzling definition.

Bill was a personal trainer and instructor in several gyms and health clubs. I trained with him on a number of occasions and was highly impressed with his intelligent approach. He was one of the first bodybuilders to promote the idea of doing all the pulling exercises -- like lat pulldowns, curls, flyes and side raises -- on one day, and all the pushing movements -- like presses, bench presses and triceps extensions -- on the next. It worked great for him.

I often refer to Bill as the "uncrowned Mr. America" because I believe that he would have won that title one particular year except that he lost 17 pounds of muscle during the last week before the contest -- and still placed second! If he had concentrated solely on bodybuilding instead of his career as an artist, he could have become Mr. Universe. Ask Larry Scott or Vince Gironda if you don't believe me.

Here are the exercises and workouts that helped Bill McArdle build his great chest. The intermediate program was part of a six-days-a-week routine. When he was using it, Bill worked chest, deltoids and triceps on Monday/Wednesday/Friday; on Tuesday/Thursday/Saturday he trained thighs, lats and biceps, as well as getting in another round of midsection work.


Intermediate Chest Program

Incline Dumbbell Bench Press, 3 x 8-10
Decline Dumbbell Flye, 3 x 10
Dips, 3 x 8-10
Straight-Arm Pullover, 3 x 15


Advanced Chest Routine One
Mass: Monday/Wednesday/Friday

Decline Barbell Press, 5 x 10
Incline Barbell Bench Press, 5 x 8
Incline Dumbbell Bench Press, 5 x 10

Shape and Cuts: Tuesday/Thursday/Saturday

Decline Dumbbell Press, 5 x 6
Decline Dumbbell Flye, 5 x 12
Decline Dumbbell Pullover, 5 x 15


Advanced Chest Routine Two Three times per week

Superset -
Incline Dumbbell Bench Press, 4 x 8-10 to
Decline Pullover and Press, 4 x 8-10

Superset -
Incline Barbell Bench Press, 4 x 6-8 to
Cable Crossover, 4 x 6-8

Dips, bodyweight, 2 x 15-20


Freddy Ortiz
The Puerto Rican Superman  


If you'd seen Freddy in his prime, you'd never forget him. His upper body was awesome to the max! At a height of 5'5" and weighing 193 pounds with a 28-inch waist, he had arms that taped at 19.5 inches cold and a full chest that measured 50.25 inches. In other words, Freddy was freaky.

Ortiz came to California in 1967, and he, too, trained at Vince's Gym. They called him "the Freeway Kid." I took some photos of him for Muscular Development and Muscle Builder magazines and worked out with him on numerous occasions.

Freddie used to come over to my pad in Studio City and drive the landlord crazy when he'd dive off the balcony into the swimming pool. "It's nothing," Freddie would say. "I dive off the 23rd Street Pier in New York all the time, and that's 80 feet!"

Freddie was famous for his fabulous arms, but his whole torso was outstanding. His chest was magnificent -- great pecs combined with a deep, ruggedly contoured rib cage. He was strong, too, banging out sets and reps with 350 in the bench press.

"I never overtrain," Ortiz told me once. "I can't do 10 sets of 10 reps on every exercise like some of these steroid guys claim they can do. When my muscles are thoroughly pumped, I move to another muscle group. Why try to whip a dead horse?"

Here's an adaptation of Freddie's favorite chest-training program. If you're a beginner with less than six months of solid training under your belt, do two sets of each exercise. If you've been training long enough, do the workout as written. If you're up to it, you can also try supersetting the first two and the last two exercises.


Beginner and Intermediate Program
Three Times Per Week

Barbell Bench Press, 3 x 10
Flat Bench Flye, 3 x 10
Incline Dumbbell Bench Press, 3 x  8-10
Straight-Arm Pullover, 3 x 10-15

The following is the routine that Freddie used to build massive, shapely pecs and a deep, impressive rib box when specializing on his chest. Perform all movements in strict form while using the heaviest poundages possible for the reps. Gradually decrease your rest time between sets to no more than 60 seconds.


Advanced Chest Workout
Three Times Per Week

Barbell Bench Press, 5 x 10
Incline Dumbbell Bench Press, 5 x 10
Flat Bench Flye, 5 x 10
Straight-Arm Pullover, 5 x 10
Dips, 5 x 10


Arnold Schwarzenegger
The Austrian Oak


No article on chest training would be complete without a discussion of the great Arnold Schwarzenegger's approach. Arnold had the unbeatable combination of a deep, perfectly formed rib cage and massive, fully developed pecs that rippled with cuts and striations.

I remember training with him at Vince's Gym one time when Vince asked me, "Why are you spending so much time on the bench press? It's not that great a chest exercise."

"Vince," I replied, "look at Arnold's chest. It measures 58 inches. He must be doing something right."

Gironda believed that more isolated movements work the pecs better, while Arnold liked to do heavy bench presses and incline presses along with the isolation movements. Arnold's training did -- and still does -- combine the best of both worlds.

Arnold's favorite chest exercise, as you may have guessed, was the bench press. We'd start off with a light warmup set of 20 reps and follow that with sets of 15, 10, 8, 6, and 5, adding weight on each set. Arnold sometimes worked up to 440 pounds for reps. He preferred to do his incline presses with a barbell, using a wide grip. Periodically, he'd start his workout with that movement and do the bench press afterward. Whichever he started with got the weight progression and sequence described above, and then he performed the second exercise for sets of 10 to 12 reps. Here's one of Arnold's favorite chest programs.


Advanced Chest Workout

Barbell Bench Press, 6 x 20, 15, 10, 8, 6, 5
Incline Barbell Bench Press, 6 x 12
Flat Bench Flye, 6 x 8
Dumbbell Pullover, 5 x 15


When we were working out together, Arnold trained six days a week, and he worked each muscle group three times a week. He had a unique way of doing flat bench flyes that he credits with developing the outsides of his pecs. He performed them with his arms slightly bent to keep the stress off his elbows, which everyone does nowadays, and kept the movement wide. He didn't bang the dumbbells together but rather stopped at a point where they were 10 to 12 inches apart. This kept the tension on his pecs, particularly the outer portions, throughout the exercise.

I used a variation of Arnold's technique, doing one full rep, touching the dumbbells at the top, and one three-quarter rep, as described above, for a total of 6 reps each way per set. This gives you a great pec shaper, as well as adding mass to the outer portions.

On occasion Arnold and I would superset bench presses with chins and incline presses with pullovers. He did this mostly before a contest or posing exhibition.

Here's another chest specialization program that Arnold made great progress on. It's very advanced, and if you decide to try it I suggest that you gradually work up to the full routine.


Arnold's Very Advanced Chest Workout

Barbell Bench Press (medium grip), 6-8 x 5-8
Incline Barbell Bench Press (wide grip), 5 x 8-12
Flat Bench Flye, 5 x 10 superset with
Weighted Dips, 5 x 8
Standing Crossovers, 5 x 12 superset with
Straight-Arm Pullovers, 5 x 12

According to Arnold, beginners shouldn't try to specialize on any muscle group until they have trained on a basic all-around program for 6 to 12 months. Once they've gained some muscular weight and size, they can give more attention to muscle groups that seem to be lagging behind.

For intermediate lifters Arnold suggested a variation of the first program listed above, as follows.


Intermediate Chest Program

Barbell Bench Press, 3 x 8-10
Incline Barbell Bench Press, 3 x 8-10
Flat Bench Flye, 3 x 8-10
Straight-Arm Pullover, 3 x 15

Even though Arnold and I trained together for only a few weeks, I learned a great deal about chest training from him. We worked out hard and fast, and frequently we were joined by Charles Fautz, who won the IFBB Mr. America Tall class. When Arnold and Charlie started banging out reps with 400-plus on the bench press, I had to reduce the poundage for myself. Arnold said, "Gene, always work within your capacity. Don't try to do as many sets as I do if it is too much for you. Do the best that you can do. Make every rep of every set count by concentrating all of your attention on the muscle you're working."


The Buzz, Circa the 1930s - Jan Dellinger (2015)


Letter From Peary Rader to Bob Jones
 Click to ENLARGE


Every historical period of the Iron Game had its luminaries. Did you ever wonder if these names of note communicated privately? If so, what, or who, did they discuss among themselves?

Keep in mind that this was long before the days of email, Skype, Facebook, instant messaging, etc. Oh, to be a fly on the wall at the office of George Jowett, Earle Liederman, Bob Hoffman, Peary Rader, Andy Jackson, Bernarr MacFadden or a few others. Better yet, get your hands on their typewriter ribbons and carbon copies.

As luck would have it, a few pieces of vintage correspondence between these Iron Game Icons have survived the passage of time and will be presented to the Tight Tan Slacks of Dezso Ban audience. The first of these mailbag masterpieces is a letter from Peary Rader to hand-balancing great Bob Jones.

 While the former remains a readily recognizable name in the course of Iron Game events, the latter would, at best, be classed as a "minor player," if remembered at all, by the majority of might and muscle history buffs. However, allow me to assure readers that there was more to Jones than meets the eye. Hence, a bit of background is required to properly set up and introduce Rader's remarks to Jones. 


Regarding Bob Jones, I learned much about him upon having the opportunity to visit his Philadelphia warehouse back in the 1990s.  For starters, he maintained his own age of information without benefit of computers or electronic devices. Talk about a paper trail, this man maintained documents in duplicate and triplicate regarding just about every facet of his life. More remarkably still, he sometimes even had black and white photos of that paper trail.

Jones himself had been strongly aligned with the Milo Barbell Company prior to it running aground financially, and served as a focal figure in its transition after Milo was purchased by Bob Hoffman. Bear in mind that even though the Milo company had declared bankruptcy, there were customers' orders (and dollars) in limbo for a considerable period. Consequently, the patience of these longstanding customers, customers who Jones and Hoffman sought to make eventual York Barbell/Strength & Health magazine converts, was taxed severely. During this delicate transition stage, Bob Jones served as the "appeasement department."

As serious students of Iron Game history recall, in the late 1930s, Bob Hoffman sued Charles Atlas over false advertising claims the latter made. Specifically, Atlas gave the distinct impression in his ads to have built his eye-catching "bully proof" body sans apparatus of any kind, including barbells and dumbbells. However, it was known in the very esoteric, far-flung bodybuilding community of that day that Charlie had, in fact, originally acquired his prowess via the weights.

Because Atlas ads were quite successful, the contention settled over the hearts and minds (and don't forget, available dollars) of the mail order muscle crowd. Besides, it was tough enough to make a living selling barbells and dumbbells against the economic constrictions of the Depression. BoHo didn't need someone running around telling the world that weights were not required to build a handsome, rugged physique. Likewise, it had to be especially galling when the purveyor of this deceptive marketing tale had, in fact, been a barbell man.

Of course, in order to initiate legal proceedings, Hoffman had to show just cause and sufficient grounds to elevate the argument to that level. Enter Bob Jones. Whether it was of his own choosing, or he was formally "employed" by Hoffman to do the necessary investigative leg work to establish the facts against Atlas, I cannot tell you with certainty. However, I can tell you beyond any doubt that Jones was an absolute bulldog when it came to moving heaven and earth to expose Atlas as the bona fide weight trainer he was. Again, thanks to surviving correspondence, it is crystal clear that Jones tapped any and every source imaginable inside and outside of the mail order muscle world in this, what would appear to be, a personal crusade.

Obviously, Peary Rader was one such potential information avenue Jones sought out,and you see here the Iron Rader's responses. Incidentally, some of Peary's off-the-cuff comments display a bit more candor than he would usually offer in print.

And for the benefit of the history detectives out there, the postmark on the envelope containing Peary's letter to Jones indicates that it was mailed on June 20th from the Alliance, Nebraska post office. Unfortunately, the final digit of the actual year is illegible in the stamp. On the other hand, if it is of any assistance, Peary's letter was mailed to: Milo Barbell System, P.O. Box 6777, North Philadelphia, PA.

By the way, if you enjoyed the glimpse at these Iron Game pen pals, you might also enjoy the upcoming 1932 letter exchange between Bob Hoffman and David Willoughby . . .      


Blog Archive