Monday, November 26, 2018

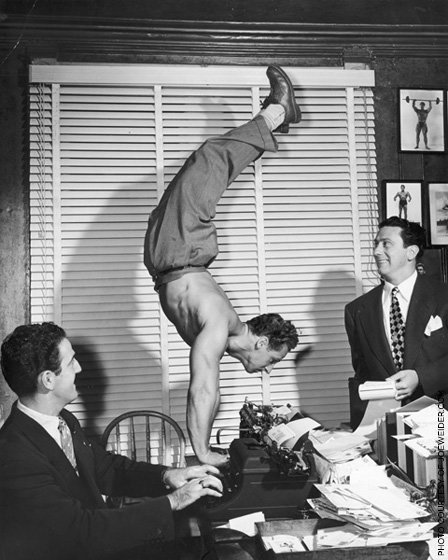
Emotional Fitness and Your Hidden Reserves (complete, with no add-ons!) - Russell J. Fornwalt


Originally Published in This Issue (April, 1965) 


What makes a champion? 

Is it physical fitness? 
Is it mental alertness? Or is it emotional balance? 

No, it is not any one of these factors alone, but a powerful combination of all three that makes a fellow elite in anything from marbles to mountain climbing. 

You can have the finest physique in the 50 states. But if you are full of fears and phobias, your chances for stardom, or even moderate success are greatly reduced. 

In today's highly competitive world of sports, emotional fitness is a must. As an aspiring athlete you can not expect to make the grade if you harbor all kinds of hates and hurts in your heart . . . the seat of your emotions, so to speak. 

As a coach, you can not expect members of your teams to win victories if they play with play with feelings of insecurity, inadequacy, or hopelessness.

To get a better idea of emotional fitness and just what it involves, we queried a number of well known coaches and athletes around the country. And, although they express themselves differently, they all, without exception, attach great importance to the matter of training oneself emotionally as well as physically


Sense of Purpose

Coach R. W. Coleman of the Princeton University football team says, "Athletes must have a purpose and be motivated to achieve that purpose. Training must be competitive and changing to avoid boredom and routine. Specific goals that are within reach must be constantly set. That is, after one goal is reached by the players another must be established for them.


Praise Helps

"Material rewards are not as satisfying as personal compliments and encouragement," declares Bobby Richardson, of Sumter, South Carolina, brilliant second baseman for the New York Yankees. "The teenage athlete should feel that he is achieving and being successful. Then praise appropriate to his ability should be given."

Bobby also believes that it is helpful to have an abiding faith in God. He points out that we are spiritual as well as physical beings, and the person without faith may find it hard to control himself emotionally.


"Feel You Want to Play"

"I certainly consider 'emotional' conditioning almost as important as physical conditioning," counsels Coach Red Sullivan of the New York Rangers hockey team. "A player in any sport must feel he wants to play or else he will probably be useless to his team."

According to Sullivan, the athlete's emotional fitness depends upon three factors:

1) a healthy relationship with the coach and the other players;
2) a "want-to-play-more-than-anything-else" attitude as game time approaches; and
3) the ability to stay keyed up even for the less important games.

"Of course," adds Sullivan, "it is practically impossible for any player or team to have these three qualities all of the time. But the team or player that has them most of the time will come out on top."


Training and Practice

"I suppose you mean by 'emotional fitness' the ability of an athlete to rise above the feelings and fatigue and the other distractions during practice and competition that beg him to quit," says Joseph W. Buck, Coach of Rowing for the University of Pennsylvania.

Continues Burk, "There are only two basic rules that I know of that will protect the athlete when these nearly irresistible urges strike him.

"First, he must have his body physically strong. This is attained through the everyday, common sense training rules that have been laid down almost from the beginnings of sports.

"Secondly, he must prepare his mind and spirit through the day in and day out drudgery of practice - in rain or snow, heat or cold.

"Finally, there gradually comes a satisfaction out of ignoring the hurt. It is accepted, but not enjoyed. The athlete learns to take discomfort and disappointment as a part of his lot. He realizes that his chief enemy is not pain itself, but fear of pain."

In the final analysis, according to Coach Burk, the attainment of "emotional fitness" runs parallel to the acquisition of physical fitness. Physiologically, muscles are strengthened by subjecting them to gradually increasing resistance. The body attempts to build itself up to meet the ever-increasing muscular challenge.

"The development of willpower and the strengthening of spirit," says Burk, "are achieved in the same manner. For this reason, the toughest and the best athletes often arise out of the most difficult practice conditions. The daily demands upon their willpower only serve to make them that much tougher mentally for the grueling competitions of the future."


"Accept Disappointments"

Pete Elliot, Football coach for the University of Illinois, has this advice for those who would be emotionally and mentally fit to play football: "Always play well or make the attempt to do so. Be able to accept disappointments and do not consider them as failures. This will give you the quality of not losing confidence and being able to bounce back."


Preparation in Basic Skills

John Wooden, coach of the Bruins' basketball team of the University of California at Los Angeles, offers the following five suggestions for emotional fitness:

1) be properly conditioned - morally, mentally, and physically;
2) be prepared properly in the fundamental skills;
3) be completely devoid of egotism, selfishness, jealousy, and envy;
4) appreciate your own "blessings" without comparing them; and
5) do everything within your power to become the best that you are capable of becoming. This will help to give you peace of mind as well as self-satisfaction

Clean Living

Buster Crabbe, one of the country's greatest swimmers and former Hollywood movie star, says, "Emotional conditioning for the athlete is basically a matter of doing three things:

1) thinking clean;
2) being clean; and
3) playing clean.

Observe these simple rules and you will be a true winner every time. Remember also that "outlook" is important. Feel within yourself that no one can beat you. Don't be afraid to set your sights high, and don't throw in the towel when the going gets tough.


Lover Your Work

"A person must have a love for whatever he is doing, and I am of the opinion this is the one thing to keep in mind," declares Jackie Robinson, former player with the Brooklyn Dodgers baseball club. "If you do not like what you are doing, it is not going to be easy to make a success of it."


Value of Exercise

According to medical and physical training authorities, exercise contributes much to a person's emotional, moral, and mental fitness. In other words, as you do your daily drills in weightlifting, pushups, or situps, you also develop confidence and courage

"Exercise helps the mind, spirit, and boy, and serves as an antidote for mental stress," declares Dr. Paul Dudley White, noted harp, that should read heart specialist and physician to former pResIdeNt Dwight D. Eisenhower.

Charles B. (Bud) Wilkinson, former head of el Presidente's Council on Physical Fitness, says, "I submit to that if you do not care enough about your own physical well-being to keep yourselves in condition to function effectively, it is difficult to muster great moral courage, to be totally honest, and to develop those other qualities of character that are fundamental."


Practical Steps

To a large extent, thus far, we have spoken in generalities. And purposefully as, for we wanted to give our theme, "emotional fitness," an air of authority with comments from coaches and others. But now let us get down to the specifics or the "how-to's" in emotional training. For success in athletics depends upon positive feelings as well as a powerful physique.


When Training

Get the gripes, grudges, and grouches out of your system. If you don't, they can rob you of much of your vim, vigor, and vitality.

Training rules and routines are not exactly a bed of roses. But if you inwardly resent or reject them, your only reward will be reduction of your stamina and strength.

The suggestion to athletes is this: If you feel you have a legitimate beef or gripe, don't repress it. Discuss it with your coach, trainer, or physical education instructor. If something is wrong or unfair it surely can be corrected to everyone's satisfaction.

The suggestion to coaches is this: Encourage that disgruntled athlete to ventilate his feelings. Have him do so in the privacy of your office rather than in the gym or on the playing field. Help him get the hates and hurts out of his heart.

The athlete who stores up anger, anxiety, and animosity is not contributing to his emotional health. The wise coach, the one sensitive to the inner feelings of team members, will provide outlets for their anger, anxiety, and animosity. In some cases, the outlets can be in the form of man-to-man talks, or they can be situations in practice of games.


When You Win

Avoid becoming conceited or cocky when you conquer your opponent. You have e very right, of course, to feel confident and even great. But you'll have nothing to gain by lording it over the poor fellow who lost. Don't publicly belittle his ability. Praise him for something, and wish him well in future events.

It's a sign of emotional maturity to win with dignity, genuine modesty, and respect for your opponent. Be grateful, too, and give credit to those, such as coaches, trainers and other team members, who helped to make your success possible.


When You Lose

If you lose a tournament, meet, or match, don't get mad or throw a temper tantrum. Congratulate the winner. Shake his hand, pat him on the back, and even wish him more success.

Yes, the ability to give . . . and give generously . . . is another sign of emotional fitness. and you will find, as you go through life, that giving never impoverishes the giver.

Don't let a defeat get you down in the dumps. Of course, we don't expect you to go dancing in the streets either when you lose. But another good sign of emotional control is the ability to look at a loss objectively.

If you've trained hard and played hard, a defeat naturally will be a disappointment. But try not to panic or go all to pieces. Feelings of resentment, bitterness, or the "I wuz robbed" bit can actually be a severe drain on your physical resources.

There's an old saying to the effect that "You can't win 'em all." Well, if you go purely by the scoreboard, perhaps you will not win 'em all.

Strange as it may seem, it is sometimes from the losses which you gain the most. You learn just what your weaknesses and inadequacies are. You learn that you need to practice and sacrifice more. You may learn that the breaking of training rules just doesn't pay off.

Some coaches believe an athlete learns more from losing than wining. Win, lose or draw - if you develop emotional control you will definitely gain something of value from every game, meet or practice session.       


The A to Z of Shoulder Development - Chuck Sipes

THANK YOU, LIAM!


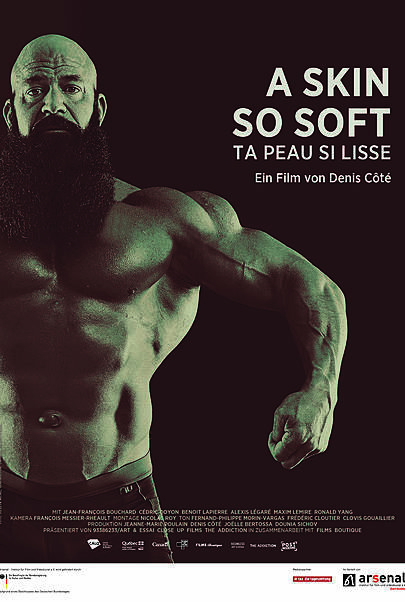
"Ta peau si lisse" - "A Skin So Soft" released June 19th of this year. I was very impressed with this documentary, and for a change viewed a bodybuilding film and wasn't bored to yawning tears by the first 20 minutes. There are some good reviews by people who are not lifters at the second link above -

This one in particular:

. . . open-minded cinephiles will be surprised as they are drawn into a universe in which they may have had very little interest."

It shows the day to day of it, in a very patient way, with spare but meaningful dialogue.

There are two or three scenes capturing some the men involved in training others, and one being trained that really showed me some new things. I'd really recommend this film . . .

not to everyone, but to those with enough patience to enjoy a film on bodybuilding that doesn't choose to blow out your eardrums with typical music and bang you over the head with faux celebrity development. There be rewards here!

It's media at this level that, I believe, can result in a better understanding among non-trainers of bodybuilding. And did I mention there's also a strongman/wrestler in it?

No matter what subsection of the Iron Sports you are interested and involved in, check it out when you get a chance to relax and go with it. 


Walter Milner, Vancouver, B.C. circa '75 - 76.
Trained at the East Hastings Western Gym.
Capable of raw gym lifts of
Bench - 405 x 3 touch and go
 Deadlift  - 575
Squat - 600
at bodyweight under 200.
A few more Chuck Sipes things here:

 Don Howorth

Whenever I think of shoulder development, the name Don Howorth automatically comes to mind. Here is a champion who started with average development but who, after much concentrated effort, eventually built what must be the greatest shoulders in bodybuilding today.


Motivated enough yet, Buddy? 

When planning a shoulder training routine it is wise to consider the three heads that make up the deltoid: 

The anterior head which, when developed to full capacity creates the much sought after pec/delt tie-in. The lateral head which add w  i  d  t  h  to the shoulders. The posterior head for that dense, thick look. 

Your exercises should thoroughly attack all three deltoid heads if you are to reap the desired results from your training routine.  


Specialization

While there are a number of trainees whose shoulders respond very well to normal deltoid training, the majority will need specialization work. From the start, I would like to point out that specialization training is strictly for advanced trainees. Only those who have been training for at least one year consistently need think about undertaking this schedule.

Priority

Specialization is most effective if you hit the area at the start of your training session, when your energy and enthusiasm are at peak levels. You should, however, never attempt to specialize on more than one bodypart at a time. Having brought one muscle group to the required standard of balance with the others, you may then switch your attention to another. But always ONE AT A TIME.  


Caution

While I am a great believer in the use of progressively heavier training poundages, I wish to point out that quite a number of shoulder injuries are the result of trying to handle maximum training poundages before the shoulder muscles are completely heated and prepared. 

Trainees should constantly strive to use heavier and heavier poundages. This will force the muscles, the deep fibers, to work and the result will be more massive, stronger shoulders. But nothing will be gained if the poundages attempted are so beyond the capabilities of the trainee he is forced to swing his way through the exercises. EXERCISE STYLE SHOULD NEVER BE SACRIFICED. Force the muscles to handle heavier and heavier weights but never become so enthusiastic that you lose all sense of proportion. 

It is a good rule in shoulder training to stick with a poundage that you can use for a maximum of 10 reps which allows you at least five good, very strict repetitions. Always train quickly and aim for the best pump of the area being attacked. One more point before we get into the actual exercises. Train in a long sleeve sweat shirt and keep your whole body warm during your workouts.

Exercise 1 - Press Behind Neck:

This is a wonderful delt exercise, one that will pack size and strength into the area. I start with a very light poundage and perform 2 quick sets of 15 reps to thoroughly warm up the area in preparation for the bombing that will follow. Having satisfied myself that I am ready to start work, I choose a poundage that will allow me 5 reps. I stick with this poundage for 2 sets and then I increase the weight so I can just squeeze out 3 sets of 3 reps. By this time my deltoids appear like melons. Pumped up to capacity. Inflated to infinity. Deliciously dilated. Yes! Swell swelling, Baby! But there is one more heavy set to come. This time I choose a weight which I can manage for just 2 tough reps. Then I take a short rest before lightening the bar to a moderate poundage and pressing it for an eight flushing reps. Altogether, not including the 15's for warmups, I have then performed 8 sets - 2 x 5 | 3 x 3 | 1 x 8. Read the above carefully and perform the PBN as outlined. It will work wonders for you.

After a short recoup pause, I perform the next two exercises in SUPERSET style. To superset, you do not rest at all after the first set, but move immediately to the next exercise for a set. Then, you take a slight pause and repeat the two exercise combo.


Exercise 2 - Barbell Front Raise: 

Hold a light barbell, hands shoulder width apart, palms facing downward. Keeping the arms straight, slowly raise the barbell to shoulder level, hold for a count of two and return slowly to starting position. This is, of course, a great one for the frontal deltoids. Perform 10 reps, concentrating strongly on the action. Without resting move on the the second section of this superset . . .

Exercise 3 - Dumbbell side lateral raises will add great thickness to your deltoids and give you that desirable wide look. Use a pair that will allow you strict performance of 10 reps. Heep your palms facing downward throughout the movement [however, I have found that when one of my shoulders is giving wee grief to me, changing the direction the palms face, just tweaking that on that particular day, can take some of the ouch away and let me get in good reps still]. Slowly raise the bells until they are parallel with the floor. Hold for a count of 3, contracting the side delts strong, Strong . . . STRONGLY before returning SLOWLY to the starting position.Do 10 reps.

Now you take that rest pause. Rest just long enough to catch your breath before repeating for 3 more supersets. You should aim to shorten your rest pause with every workout, until you barely need to take a break!


Exercise 4 - Seated Front Press:

Adopt a seated position on a flat bench with barbell held at shoulders. Take a deep breath and press the bar to arms' length above your head. Breathe out as the weight is returned to starting position. Try to force out the last two or three reps and constantly strive to handle heavier weights, not at the expense of style. Do 4 set of 8.


Exercise 5 - Bentover Lateral Raise:

Here's a really good one for the posterior deltoids and the muscles of the upper back. Take the same poundage that you used earlier for the lateral raises. Bend over from the waist until your upper body is parallel with the floor. Now bring the bells up to shoulder level. HOLD FOR A COUNT OF THREE before returning to starting position. Try to resist the dumbbells as they travel backwards. Force them to move in a straight line with your shoulders. 4 x 10 reps.

This, then, is your specialization routine. You should try to train as quickly as possible. I go through the whole routine is less than 45 minutes. Take your time at first but gradually speed up your training tempo. Training tempo does not necessarily mean rep speed, eh.

Those of you who have followed my training career will know that I place great importance on my nutrition. It is just plain ridiculous to attempt a specialization routine if you are not prepared to make adjustments in your regular diet. You should be sure your regular meals supply you with adequate protein and vitamins so that your body may recuperate from your training. What's more, you also need extra nutrients to encourage and cover growth. I will for your guidance, as an example, the kind of diet I employed before my last Mr. Olympia appearance.

Breakfast:
2 pieces whole wheat toast
Whole grain cereal and milk
Fresh fruit
2 eggs and 2 beef burger
Fruit juide

Lunch:
Tuna sandwich
Soup
Salad
I glass whole milk
Ice cream (vanilla)
1 banana

Supper:
Fruit
Steak or fish
Salad
1 glass of milk
Yogurt

Between meals, six times a day I had a special drink that might be of interest to you. It consisted of milk, honey, black strap molasses. 3 raw eggs, protein powder and ice cream.


Sunday, November 18, 2018

Front Squat (excerpt) - Andy McKenzie/Mark Laws


The ego can be such a cruel mistress at times, and leg day is one of those times. There are a whole host of reasons why the Front Squat is such a valuable weapon to have in your training arsenal, yet the more familiar and traditional Back Squat always seems to take center stage. 

The front squat will build your quads more than a power back squat, it is a more accurate measure of athletic strength and has a much higher transfer into the Oly lifts, it places less pressure on your lower back and it will aid your flexibility. Sounds good, right? So why aren't more people doing them? 

Most likely it's because they cannot get as much weight on the bar as they can for a back squat. Even if they were to drop the poundage down the front squat is a much more technical lift with more scope for error.

However, if you can leave your ego out of the equation then this short "Front Squat Guide" from world class strength and conditioning coach Andy McKenzie will give you the help you will need to introduce the front squat into your program with confidence and competence.

Note: The full article (M&F Oct. '18) includes foam roll prep for the lats, tris and low back.


Wrist Mobility:


   Click to ENLARGE


Double Kettlebell Front Squat

 Perfecting a Double Kettlebell Front Squat is a really nice stepping stone before moving on to the barbell. Without any weights, place both palms together and hold your fingers close to your chin, as if you were praying. This is the position we are looking for the hands and arms to be in when loaded up with the kettlebells. To save your gripping muscles keep the fingers pointing up towards your face, or wrap them very loosely around the handle, ensuring that the kettlebell handle sits at a 45-degree angle across your palm.

Once you have a comfortable position at the top of the squat sit down nice and steadily into the deep squat position. It goes without saying that the heels need to stay flat on the floor and your back needs to stay nice and straight as you move down through the squat, but you also need to keep your elbows directly beneath the kettlebells. So, as you squat down the elbows will come away from your body which gives you the added bonus of some extra upper body work . . . you're welcome!

At no point in this movement should your shoulders round forward. Keep pulling the shoulders back throughout the entire movement, holding them in a nice strong and stable position.

A steady, controlled 3-second descent would be nice, followed by a 2-second pause at the bottom to ensure stability and control, then DRIVE up back into the start position with an explosive forward drive of the hips. 3 x 6-10 reps will be suitable preparation before moving on to the barbell.  


Barbell Front Squat


Place a barbell in the power rack, squat stands or on boxes somewhere between your sternum and shoulders. A mistake that a lot of people make is to place their fingertips on the bar, then pushing their elbows forward so that the bar rests on their fingertips. This can tighten up the muscles in the forearm and cause pain or discomfort in the wrist. 

A more user-friendly option is to make the "OK" sign with your thumb and forefinger around the bar with your palms facing the floor (so the bar will go between the circle you made), then drive the elbows forward as if you are revving a motorbike so your palms will finish up facing the ceiling. This will allow you to take a good grip on the bar and remain in control at all times. The bar will rest across the front of your shoulders and your fingers will be just outside the line of your shoulders. Get your hips and feet directly beneath the bar and lift it up out of the rack, take a couple of small steps back and you're ready to squat. [Note: I prefer a 'three total steps' walkout. No fooling around getting set up. Something I'm glad I spent time learning. Lift bar up outta rack, right foot back one small step, left foot back one step, right foot out to your chosen width of stance. No, this ain't for way-wide stance power squatting.]  

Keep your eyes fixed on a spot on the floor about 6 feet in front of. This way your head can stay in a neutral position to your body throughout the entire movement. 

The teaching points for the Barbell Frott Squat, nasty piece of misspelling there, are the same as we covered in the Double Kettlebell Front Squat previously, it is just the shape and position of the load that has changed. 

One of the most common mistakes and problems with the front squat is dropping the elbows [I woulda preferred those things originally being named "eblows" myself), so it is important to drive the elbows up high. This will naturally cause some tightness around the throat but you will get used to it over time. Note: Oly lifters can be seen pulling their head up and back quickly one time, once the bar is in the racked position. This can help with that tight-around-the-throat deal, as well as a couple other things too.      

Wrist Pain Tip: If you are struggling to keep the elbows up high in your front squats, then every time you re-rack the bar there is a very simple stretch you can do. Place both arms over the top of the bar so that it is resting under your armpits, then turn your hands so the palms are facing up to the ceiling and allow your arms to hang down as far as they can. If you step up onto your tiptoes slightly they will be able to hang down a little further. Once they're hanging as low as possible flex your arms up towards your shoulders 6-10 times. Then step backwards into a split position and rest your elbows on the bar just level with your shoulders, clasp your hands together and push your head down between your elbows. Then switch your legs and repeat. The reason for doing this in a split stance is that when your body goes into hip flexion it increases the amount of shoulder extension. Once your head is as far forward as you can get it push both hands forward so that they are in line with your shoulders. Aim again for 6-10 reps. 

Movies you've seen been crap lately? 
Ending Pain in the Neck Films Tip:   

The Ballad of Buster Scruggs
A new Coen Brothers film, six short stories. 
Oh Hell Yeah! 
I loved 'em all. 


Frank Calta Interview - Doris Barrilleaux (1981)


There were several articles on Frank Calta's "Rotation for Recuperation" approach to training in the magazines of the early '80s . . . Thanks to Liam Tweed for sharing this interview with him!


Q: Frank, you have a vary symmetrical and shapely physique. I'd like to discuss how you  handle some of your individual body part routines. For instance, what do you do to bring out the outer head of your triceps, the medial head; it really adds dimension to the arm line and yours is exceptional.

FC: Thank you, Doris. The first exercise I do for my triceps is the pushdown and I use my specially designed V-Bar. It works more on the triceps and less pressure is on the wrist.  I'll do 3 sets, heavy weight - 150, 6-8 reps.

Note: Dave and Laree Draper had a real sweet thick handle V-bar for pressdowns and pushdowns that got rave reviews when it was still available. If you get lucky and manage to round one up, it'll be worth the effort.

http://davedraper.com/

For my second exercise I do French Presses. I do these on the Universal press. The reason why I prefer that over a barbell is because it gives me tension at the top. With a bar, it doesn't quite give me that tension. I use a close grip, 2 sets with 150.

The third exercise is the close grip on the bench press. I'll do 2 x 6-8 with heavy weight, around 315. Everything I do is performed with strict form. I believe in working the target muscle rather than putting four different muscles into play just to get the weight up and down. That's all I do for my triceps. Occasionally I'll throw in a 4th exercise depending on my feel. Nine times out of 10 I really don't need it because the triceps gets worked indirectly more than most bodyparts. If you do bench presses your triceps get worked; do overhead pressing and your triceps are worked; and naturally this is all in addition to the more direct triceps work.

Q: Do you ever change or alternate exercises?

FC: Sometimes when I do four exercises I'll do lying French presses with 170 as hard as I can go, but I don't do more than two sets.

Q: How about where the deltoid goes into the arm? You're very thick there. How did you work to bring about this type of separation?

FC: There again is another bodypart that always gets worked a lot, so, I never really work my shoulders that much, because I don't want to overwork them. I can't really say what particular exercise made that muscle come out for me. You need all the different exercises to make that muscle come out. There's not really one exercise to make a certain muscle come out more strongly just like there aren't certain exercises for cuts. Some say, "I do these exercises to attain more muscularity." That's not true. There are no exercises to achieve that, it is all diet.

For the delts I do the Press Behind Neck, Bentover Lateral Raises, 3-4 sets the first exercise - 6 reps with heavy weight. I'll go up to 250. Next I do bentover laterals with 55's, 2 x 8, and then I do Shrugs on the Nautilus machine, 2 sets with 300 for my traps. Occasionally I do two extra sets like I do for my triceps. In that case I'll do the Nautilus Row for the backs of my shoulders, 2 sets.

Q: You're very much against overworking, aren't you?

FC: Yes, those two bodyparts get overworked the most. I work out only 3 times a week. It is an unusual routine. There probably aren't more than a couple hundred people doing it now. Those who over the years have seen my progress tried, made good progress themselves, then one told more so it's getting more popular, but I started it about five years ago.

I call it a Rotating System. You rotate the bodyparts.

On Monday I'll do chest/back/biceps (A). Then on Wednesday I'll do legs/shoulders/triceps (B) . My abs and waist I'll do at least twice a week on either one of those days. Then on Friday I'll do what I did on Monday - chest/back/biceps. The following Monday I'll work legs/shoulders/triceps.

So . . .

Monday - A
Wednesday - B
Friday - A
Monday - B
Wednesday - A
Friday - B

repeat.

This way I work the bodyparts once one week and then twice the next. Training on this kind of system you won't overtrain. It allows you plenty of time to recuperate. Anyone who's ever tried it and stayed on it for at least 3 months has made hellish gains. Being in the business, I have put a lot of people on that program. I don't start them off that way because I don't feel beginners are ready to do the different variety of exercises.

I start them off 3 days a week working the whole body. For instance, they'll do just bench presses for their chest, leg presses for their legs, one exercise per bodypart for 3 sets. I'll keep them on that for at least 8-10 weeks before I turn them over to that rotating system. As they progress the routine will progress. As they get stronger the routine will actually cut down because the stronger you get the less you can train. You get so strong and you're in such good condition that you can over-train. People don't believe that. When you start doing 450 benches and squatting 600 it's easier to overwork.

Q: Your delts are also full from the rear showing three muscle sections totally in balance. How did you bring up the rear delt and achieve that tie-in with the muscle that inserts into the shoulder blade?

FC: There again, it is from doing the bentover laterals, and bentover rowing for my back. They definitely come into play with the bent rows. Some people just have a little more potential for different bodyparts than others.

Q: You must have a lot of potential because from your before pictures of you no one would believe it's the same body you have today!

FC: I have them hanging here in the club and no one DOES believe it. When people come into the club they may think it's my brother or someone else's body with some trick photography on the head.

Q: Some people have natural calves, natural arms or whatever, but from the before pictures you didn't have ANYTHING natural.

FC: I don't really think I did, but the POTENTIAL has to be there. If I hadn't worked my legs, they wouldn't have been in proportion to my upper body. If I'd have ignored my back it wouldn't have been as developed as it is now. Everyone has a certain potential. Not everyone has the potential to build 20" arms, even if everyone does the same routine. You're either born with it or not. The hormone balance and function is very important too.

Q: You might have been born with it but it sure didn't show till you started training. You've got a super goose-neck effect on your forearms; they sort of look like bowling pins. Did you go for that or was it natural?

FC: The way I was training there for a while had very little rest time. It's from grabbing such heavy weights on lat pulldowns or bentover rowing. Just like the triceps and shoulders . . . anything you do you are working your forearms - chins, curls, you're working your forearms so I never really concentrated on my forearms. They always got pumped up. I figured they were getting stimulated. I've seen bodybuilders work their forearms two and three times a week and they are skin and bones they're so overtrained. I am so convinced about people being overtrained, especially being in this business because I SEE IT. I see the guys that do it 3 days, 4 days, 6 days, and the guys training less and working harder are making better progress.

Q: I know, we can tell by looking at you. You don't train that often and look at the gains you've made!

FC: No, I don't train that often but I did stay at a Holiday, oh hell, but when I do train, I train HARD. I use weights as heavy as possible with good form.

Q: But it's not your entire life dedicated to training 6 days a week.

FC: I tried 6 days a week about 7 years ago and I was thin and just felt run down all the time. My strength was bad and I was weak.

Q: When you pose these body parts, do you have any secrets for making them stand out under the lights or in standard outdoor photos?

FC: No, it's no secret. It's all in the practice of posing. If you're a good poser, no matter where you're taking pictures the muscle is going to show. If you're overweight or smooth or not in shape no matter how good you can pose the muscles just will not show. If you've got muscles and you know how to pose and you have control of the muscle group you are going to make it do what you want. I've learned good control of my thigh muscles where I can make them move up and down. People ask how I got those grooves in there but a lot of it is control. But then I have different exercises I use for my legs that no one really had a chance to use, like the leg press I designed. I think that helps a lot and everyone who has used it has said the same thing. This press is on a 45-degree angle.

Q: You're a very good poser. How did you learn to pose? Did you copy anyone?  

FC: I think I have a lot of natural ability. I'd study the mags and see a certain pose I liked and I'd try it. I'd look in the mirror. Then I'd put them all together. Then as my physique started maturing and getting more muscular I just started figuring out my own poses and just kept practicing. I think karate helped a lot. I had 4-1/2 years of karate and I think with the flexibility and balance it helped a lot. Some people can't walk and chew gum (they don't get sore feet and cavities!), I was just gifted with good balance. But practice is most important. A football player or sprinter wouldn't be nearly as good if he didn't practice. You just have to practice what you want to be.

Hmmm . . . podiatrist or dentist?


Monday, November 12, 2018

Chest Training 1955


Originally published in this shockingly inappropriate issue (July '55)  


HERE'S HOW TO DEEPEN YOUR CHEST 
by Joseph Weider, T.O.C. (T.M.B.)

If you are a beginner and have found it tough to add inches to your chest during the introductory stages of bodybuilding training . . . if you're a more advanced man and lack good pectoral development and proportionate chest muscularity . . . then something is drastically wrong. Bother, you've sure been following the wrong system. It's pretty obvious that if it had been The Weider System and its training principles, you would now be in possession of a full, thick, beautifully shaped chest with slab-sized pecs to top it of.

The Weider System:
The Weider System Dumbbell Training Course: 

The pectorals are the easiest group in the body to develop. There are more exercises and types of equipment to bring them and their allied groups to a peak of muscularity and power than for any other section of the human physique.

No bodybuilder need walk around with a flat bony chest or poorly proportioned pecs if he follows the Weider Principles as outlined in this article. Note: I'm leaving all the hoopla and self-promotion in this one. But not the supplement recommendation crap. I can not only honestly say, but I will guarantee that if you keep to the advice, and incorporate some of the exercises in this article into your workouts, you'll get such amazing chest bulk that you'll increase four inches in three months. Yes, it's that easy if you know how.

If you doubt the value of the Weider System and its training principles, pick up any magazine on bodybuilding printed prior to 1940. Look carefully at the photos of the bodybuilders in it, many of them with flat, bony chests and disproportionate pecs, at the chest poses of the oldtimers such as Hackenschmidt, Sandow, Saxon and Grimek . . . yes . . . even Eddie Theriault.

Oh, you mean that Eddie Theriault.

See for yourselves how they all lacked not only pec development but what we instructors call the classical torso. It was only with the advent of the Weider System, the new types of equipment we sponsored and promoted that Grimek, Theriault and the others who followed in their path got that high, full chest appearance. So right from the start you must understand that there is only one way to develop pecs fast and that is with the modern Weider Methods and Training Principles, plus the types of equipment sponsored by the Weider Research Clinic.

There is hardly a famous physique model of today who has not followed our methods, and because of this there is no man worthy of the name of Physique Champion who does not possess good pec muscularity and form. Aside from the invention of water, this type of pec development is of the greatest Weider discoveries. I couldn't resist.

Look at the powerful physiques of Reg Park, Clancy Ross, Lou Degni, Jack Delinger, George Eiferman to mention a mere few. They are products of our principles and I am going to pass on to you the exact methods and exercises they used to build their massive pecs, so that you can follow them and take advantage of their experiences and knowledge gained through the use of Weider Principles.
To begin with, the chest muscles must be worked individually, not in coordination with the others.

Yes, the pecs come into play when the shoulders and arms are worked, but the fastest and most productive way to build your pecs is to concentrate on them alone, and let the other muscles come in for some work indirectly. You must specialize on the pecs, work them, make them grow with the Weider Cheating and Peak Contraction Principles. Cheating exercises with heavy weights will give the pecs depth and bulk. Exercises with lighter weights in combination with the peak contraction method will give them shape and chiseled form. For this reason I am splitting the article into two parts: one for the movements to add bulk and depth, the other for shape and definition. So, we'll assume your pecs are not fully developed and properly proportioned, that you want to add more size to them. Let's go on a journey of ten steps.


Step One: The Muscle Priority Principle

When you start your workouts, exercise your pecs first. Use the Flushing Method and perform 3-4 exercises . . . two for bulk and two for form and muscularity. Start off with the first exercise, following through with the necessary combination of sets and reps. Pause for a minute or two, then go on to the second exercise, following the necessary sets and reps again. Take another pause when these are completed, and go on to exercise three and so on. After you've finished your pec work start your routine for the other body parts, but remember this: THE PECS COME FIRST EVERY TRAINING SESSION.


Step Two: Choice of Exercises
Look over the exercises illustrated.         

Click to ENLARGE


Pick out two cheating movements and two definition exercises you want to use in your next workout routine for the chest. But remember this: you must perform heavy bench presses every workout . This exercise is a MUST. If you so desire, you may keep to the four movements plus the bench press for a month and change after that time to another four different exercises plus the bench press for another month if this system suits your temperament. 

Others prefer to change the exercises every workout like Steve Reeves does, and this can be good too. Still more might train like Reg Park, changing the program only once every six months, and this also is okay. You will have to experiment and see what suits you best, what fits your particular temperament for fastest muscle and power growth.


Step Three: Choice of Poundages

You must handle as heavy a weight as possible in all your exercises. The constant handling of heavier and heavier weights forces your muscles to grow bigger and stronger. If on a particular day you feel full of energy and pep, try to use heavier poundages than previously. If you are tired, don't force yourself to try and increase the poundages with every workout. Let this rule guide you . . . if the weight feels particularly light, add more poundage. Since it is impossible to add size and thickness to your muscles without handling heavy poundages, in bulk programs stay away from light weight and high repetitions. These will never bring swift pec growth.


Step Four: Timing Your Training

Don't rush through your exercises. From the moment your hands touch the bar until they put it down at the completion of a set, concentrate on all that you are doing, on the exercise form, on the muscles' action, visualizing them growing bigger, stronger and more defined. Don't swoop the weights back to starting position. When pressing, press deliberately and lower the weight down slightly faster than you press it, but don't drop the weight down like a hawk swooping on its prey. Don't forget these points . . . concentrate on the exercise and the muscle action, perform the exercise deliberately, control the weights back to the commencing position.


Step Five: Choice of Sets

Never perform more than 3 sets of an exercise and never do more than 10 reps. All Peak Contraction exercises should follow the same procedure. When performing Cheating exercises and handling extremely heavy weights, still keep to 3 sets but don't go above 6-9 reps depending on both the poundage you are handling and your energy level for the session. Pause briefly between each set. Perform your repetitions, rest for a while, and then go on to the second set, and after another pause, the third set.


Step Six: Forcing the Repetitions

If you are particularly anxious to make extra fast gains and have already been working out for at least 6 months, take advantage of the Weider Forced Reps Principle. Here's how it works in the bench press: You must use an extremely heavy weight that will just allow you to grind out 7 repetitions. Two training partners assist you, one at each end of the bar, to grind out another two additional reps after you have just completed the seventh. They "finger" the bar up for you . . . not too much but just enough for you to keep the bar moving. This principle is best saved for the more advanced exerciser.


Step Seven: Choice of Accessory Equipment

Next tot barbells, the most important piece of equipment is the Weider Adjustable Exercise Bench. There's no argument about this . . . it's a must. While the pecs can be worked a little when you are standing, the exercises are not completely effective and variety of movements restricted. But on the flat or incline bench you can perform at least three score effective pec exercises. The movements that go with this article show some of the best, and give you an idea of the wide range of exercises possible. On exercise benches the greater amount of weight you can handle makes the pec movements much more effective too, and in fact, with the exception of certain dipping movements, it is impossible to build outstanding pectoral development unless you do use the flat and incline exercise bench. So order this combination bench at once if you are anxious to build up those floppers fast.


Step Eight: Booster Exercises

After you have completed your pectoral workout you should perform muscle control movements, tension exercises, standing before a mirror, crisscrossing your arms and forcing pec tension, or placing your hands palms together in front of the body and at shoulder level, and pressing them together with all the power at your command. These motions plus massage will teach you how to control the pecs for posing as well as how to concentrate more fully on their action when exercising.


Step Nine: Timing the Workout

When working the pecs, don't expect to get the training over in anything less than 30 minutes. Better make up your mind to devote at least 45 minutes to pec work when specializing. Some champions devote as much as 90 minutes to bring their pecs up, so don't just perform a few exercises and let it go at that. Make up your mind before ever you start training to devote not less than 30 minutes to the group.


Step Ten: Correct Breathing

Remember that chest perfection does not come solely as the result of pectoral development. For that high chest arch the way you breathe has an important bearing. Always breathe in as deeply as you can, arching the chest high, thrusting up the rib box as much as possible. Don't take a scared, tiny breath, but force the air into your lungs and force it out. This will not only help increase lung capacity but will strengthen the internal cheat muscles and help push up the chest to even greater size. So with these 10 steps firmly fixed in your mind, let's tackle the best pectoral developing exercises. Notice in the illustrations above how they are split up into two parts: those for bulk, and those for definition; the Cheating and the Peak Contraction movements.


Bulk Building, Cheating Exercises

Exercise 1: Wide Grip Bench Press to Chest
Lie on an exercise bench, a barbell held at arms' length above your chest with a collar-to-collar grip. Take a deep breath stretching your chest and forcing the rib box up, then steadily lower the barbell down to your chest. Press it steadily up to arms' length again and repeat. Try not to arch your back up off the bench. Don't rush through the exercise. Use all the weight you can handle and cheat when the last few reps get tough. Perform 6-9 reps for 3 sets, and after six months use the Forced Repetitions system.

Exercise 2: Wide Grip Bench Press to Neck
Lie on the exercise bench, a barbell held at arms' length above your chest, collar-to-collar grip. Lower the barbell down steadily to your neck, press back to arms' length and repeat. Follow the same rules and system of sets and reps as in the previous exercise and after six months of training, begin to use the forced repetitions system. 

Exercise 3: Bent Arm Breathing Laterals
Notice how the end of the exercise bench is propped up on a box or block. Don't raise the end of the bench too high . . . just a  couple of inches. Hold a pair of dumbbells at arms' length above your chest, then bend the arms slightly at the elbows (see shadow inset on Illustration 3). Lower the dumbbells down and out to the sides. As you lower down, take a deep breath, reaching your peak intake as the dumbbells travel below the level of the bench and your body, and begin to stretch the chest and rib box. Raise back to the commencing position, breathing out forcefully, and repeat. Use heavy weights, 6-9 reps, 3 sets, and take your time performing the movement. Don't rush through it. Concentrate on the breathing and force air into the lungs as you lower the dumbbells, force it out as you return them to the starting position.

Exercise 4: Power Floor Presses Off Boxes, Wide Grip
Now you've really got to load up that barbell . . . way over your best bench press. Notice how the plates rest on two strong boxes so the bar bridges between them. You'll only have to press out a few inches when you get under the bar, but man, what a workout your pecs get. Use a wide, collar-to-collar grip and thrust the chest up as you press the barbell off the boxes. Lower it back as steadily as you can and repeat. Don't be afraid to force out those last few tough reps and even arch the body to apply the cheating principle. Use every ounce of weight you can handle for 3 sets of 6-9 reps.

Exercise 5: Dumbbell Bench Press
Lie on a flat exercise bench, a dumbbell in each hand at arms length above your chest, palms of the hands facing in to each other. Lower the dumbbells down to the chest, spreading the upper arms out wide from the shoulders as you do so. Let the dumbbells travel down as far as possible to fully stretch the chest muscles, then press back to starting position and repeat. Perform the exercise steadily but don't pause between repetitions. Just grind them out one after the other in steady fashion. Breathe in deeply as you lower the dumbbells and force out the breath as you press them up. Use 3 sets of 6-9 reps with all the weight you can handle, and shove up the poundage as soon as 3 sets of 9 reps becomes easy to perform. Force out those last two or three tough reps.

Exercise 6: Deep Dips on Parallel Bars, Weighted
Before you commence this make sure you can first comfortably perform 3 sets of 9 reps without any added weight. If you can, then attach weights to a belt around your waist for added resistance. If you experiment you'll soon determine the exact amount of added resistance that will enable you to grind out 3 sets of 6 reps. Go down steadily between the bars and when you are down between them as far as you can to, thrust the head and chest forward and slightly down to impart a tonic muscle stretching effect. Then push up to locked arms length again and repeat. Breathe in deeply as you lower the body and out as you push up again. Perform 3 sets of 6-9 reps, don't rush through the extercise, force out the last couple of tough repetitions and as soon as 3 x 9 is possible, INCREASE THAT EXTERCISING POUNDAGE.

These are some of the best pectoral producing exercises, tried and tested by the WEIDER RESEARCH CLINIC STAFF AND CHAMPIONS. Use the Flushing and Cheating principles with them.


Definition Producing, Peak Contraction Movements

Exercise A: Incline Barbell Press
Lie on an incline bench with a barbell held at arms' length above the chest, gripping the bar with a wide collar-to-collar grip. Use a weight you can handle for 3 sets of 10 reps. You should be able to handle it comfortably. Concentrate entirely on the exercise and the muscle action. From arms' length position above the head, lower the weight down SLOWLY, taking a deep, deep breath as you do so, reaching the peak of intake as the weight touches your chest. Press slowly back to arm's length again, breathing out forcefully, and repeat. Don't forget to perform the exercise slowly and deliberately and concentrate strongly on the muscle action.

Exercise B: Bent Arm Laterals on Incline Board
Lie on an exercise incline bench, a dumbbell held in each hand at arms' length above the chest. Bend the arms slightly at the elbows and keep them bent throughout the exercise. Lower the weights down, taking a deep breath as you lower them, forcing in the air and reaching the peak of intake as the dumbbells reach their [here's where I deleted a longwinded rant about sissified Princesses who actually believe high rep heavy squats and lifting weights are the hardest 'work' they'll ever do. It had to do with the various merits of deep breathing during chest training and wound up with some damn thing about accepting the challenge of randomly driving across the continent eviscerating as many folks as possible before getting caught. Okay then! All in a day, eh. I imagine the cleaning tasks would be pretty annoying if a guy was halfassed successful with that challenge over a long period of time. This is why car theft was invented. To remove blood, gristle and brain matter from vehicle upholstery, try baking soda and tonic water. The banality of evil, buddy.] as the dumbbells reach their lowest point, the laterals, silly, and are exerting a complete stretching effect on the chest muscles. Return to commencing position, breathing out as forcibly as you can and repeat.

Concentrate on correct breathing and don't attempt to perform the disemboweling, I mean exercise, in any way but slowly. Handle a weight good for 3 sets of 10 reps. You must be able to perform the exercise comfortably without having to force the reps . . . the last one you make naturally will be a little tough, but not so tough that it takes your mind off correct breathing and exercise performance.

Exercise C: Incline Dumbbell Press
Lie on an incline bench, a pair of dumbbells held in the feet, um, hands, at legs', er, arms' length above your chest, palms of the hands facing forward. As you lower the dumbbells down make sure your upper arms and elbows move SIDEWAYS AND DOWN do the elbows point out as the upper arms reach shoulder level. Illustration C clearly shows how the movement is performed. Of course! I was havin' a rough time figuring this one by looking at Illustrations A and D. Whew. That's better.

Pull the elbows well down to the sides but DO keep the palms of the hands facing forwards. Press to arms' length again and repeat. Breathe in deeply as you lower the bells and out as you press them to arms' length. Perform 3 sets of 10 reps and make each repetition a slow and deliberate one, concentrating on the exercise and muscle action for maximum peak contraction effect.

Exercise D: Barbell Forward Raise on Incline Bench. That deal, or a DIY version of one, are outstanding for all sorts of stuff you just can't do the same way on a seated incline bench. A standing incline bench setup and a power rack can lead to all manner of exercise variations.

Lie on that incline bench, a barbell resting across the hips or upper thighs at full downward arms' stretch. Use a fairly wide grip . . . a little more than shoulder width. From this position raise the barbell up to the position indicated in the illustration, hold it for a slow count of three, then lower and repeat. When you lower the barbell, don't let it touch the thighs but keep it about an inch off. This is not only a fine frontal deltoid movement but it gets the pecs in a new range of motion and imparts a fine Peak Contraction effect. Take a deep breath when you start to raise the bar thrusting the chest UP as high as you can. Breathe out as you lower the bar. Force the air in and out of the lungs, perform the exercise slowly, use 3 sets of 10 reps and don't forget to HOLD IT AT THE TOP of the raise in each repetition.


Exercise E: Wide Grip Bar Pushups
Using a wide grip, grip a stabilized bar, body kept absolutely straight and in one rigid line from feet to shoulders. Start from the locked arms' length position above the bar. Lower slowly down to the bar until the chest touches ti breathing is as deeply as possible. Press up to arms' length slowly and repeat. Use no resistance other than that of your body and perform as many repetitions as you can, forcing out every possible one for three sets. Don't rush through the movement or bounce into the dip and up again. No rebound. This exercise MUST BE PERFORMED SLOWLY. It's great for the pectoral sections close to the deltoids.


Exercise F: Narrow Grip Bar Pushups
Hands gripping the bar a couple of inches apart, body held rigidly from feet to shoulders, soldier. Go down slowly to the bar until the chest touches it then press up to arms' length again and repeat. Use no resistance other than your body provides and force out every possible repetition. Number of reps is important here to burn off that surface fat and impart a steel strand appearance to your chest, as they said in '55 quite frequently. Don't rush through the movement but do it slowly for 3 sets of as many reps as possible. AMRAP, as they said quite frequently in 2018.

Exercise G: Stiff Arm Lateral Dumbbell Raises
Lie on an exercise bench, a dumbbell held in each hand at arms' length above your chest. Keeping your arms absolutely straight during the exercise and locked at the elbows, lower the bells down to the sides. As you lower them take in a shallow, I mean deep breath, reaching your peak of intake as the bells reach their lowest point. Raise to commencing position and repeat. Concentrate on the exercise and breathing. Perform 3 sets of 10 reps. Steel Strand Appearance!

Exercise H: Dumbbell Rolls
Here's a unique movement guaranteed to give you a peak of pec development. Place a pair of dumbbells on the floor and assume the floor dip (pushup) position, toes touching the floor and hands gripping the dumbbells as in the illustration. Make sure the collars are loose on the bars so the plates will revolve freely. Slowly push the dumbbells out to the sides as far away as possible, keeping a check on the movement all the time. When you have pushed the dumbbells out as far as you feel is comfortable, pull them back in to starting position and repeat. You won't be able to perform this exercise too smoothly at first but do so as best as you can. With practice you'll soon get the correct way to do it. Try to keep the elbows locked, arms stiff, and 3 sets of 10 reps will have your chest feeling pumped up like a blimp.

Exercise I: Decline Dumbbell Pullovers
Notice the way you have to lie on the abdominal board, feet at the top and heat at the bottom, arms stretched above the head at a 45 degree angle from the shoulders. In each hand grip a dumbbell, the arms kept straight and rigidly locked out at the elbows. From this position pull the dumbbells up and over until they meet together above the chest. The dumbbells sadly pine, "Someday, someway, we both have a lifetime before us, for parting is not good bye. We'll be together again." Now comes the important part of the exercise. Lower those singin' dumbbells down to the same angle they started from, breathing in as deeply as you can, just forcin' that air into the lung-o's. When the dumbbells touch the floor, your chest should be thrust up into that arch yet without lifting your upper back or lower back off the abdominal board. Don't rush through the exercise but concentrate on each repetition and handle a poundage you can use for 3 x 10.


These then are the very finest possible pectoral development movements. Yes . . . there are dozens more you could perform but these are the proven exercises for greatest possible pec form. I suggest you base your routines around them and follow every particle of advice I have given you.

You are right here obtaining championship information, knowledge it took the Stars years to acquire and the Research Clinic years to compile. Yet here it is, complete in one article for you to use. So good training and good luck and may you rapidly build bigger pecs and a deeper chest.

Why not drop me a personal letter and tell me how you are making out with these exercises? I want all of you to know that I take a deep personal interest in your bodybuilding, and any gains you make in power, muscularity and massiveness make me happy as well as you. So why not write me that letter, tell me about your experiences, and help us make the Weider Research Clinic an even better functioning organization.


There's a more complete 1957 chest book "by" Joe Weider here:
http://ditillo2.blogspot.com/2017/02/a-massive-chest-for-you-part-one-1957.html
http://ditillo2.blogspot.com/2017/02/a-massive-chest-for-you-part-two-1957.html
http://ditillo2.blogspot.com/2017/02/a-massive-chest-for-you-part-three-1957.html
http://ditillo2.blogspot.com/2017/02/a-massive-chest-for-you-part-four-1957.html
http://ditillo2.blogspot.com/2017/02/a-massive-chest-for-you-part-five-1957.html
http://ditillo2.blogspot.com/2017/02/a-massive-chest-for-you-part-six-1957.html
http://ditillo2.blogspot.com/2017/02/a-massive-chest-for-you-part-seven-1957.html

It also deals with upper back training. 


Sunday, November 11, 2018

Eight Pec Plans - Roger Lockridge (2018)


Subscribe: 

35 Years Ago

70 Years Ago


Plan One: Press and Pullover
 
The combination of a power movement (bench presses) with a stretching movement (pullovers) creates a tremendous upper body pump. It's also a convenient superset, because after you finish the presses you can rotate 90 degrees on the bench to begin doing pullovers.  


Bench Press - 4 x8-12
superset with
Dumbbell Pullover - 4 x 10-15
Incline Flye - 3 x 10-12
Dip - 3 x 10-12.
 

Plan Two: Pre-Exhaust
 
The idea behind pre-exhausting is to perform an isolation exercise before you set out to do a compound exercise. The thought is that the muscle you're trying to target has been trained to exhaustion, which in turns triggers optimum growth. Your front delts and triceps will do a lot of work when chest presses are performed, but if you do flyes before presses your pecs will give out before your delts or triceps.    

Incline Flye - 4 x 10-12
superset with 
Incline Bench Press - 4 x 10-12
Pec Deck - 4 x 10-12 
superset with 
Machine Press - 4 x 10-12.


Plan Three: Flye Zone
 
The bench press may be a chest day staple, but you should consider flyes when it comes to sculpting out some great pecs. They better isolate the muscles you want to train on chest day. Once a month, give this flye-only workout a go to help maximize your pecs without extra toll being taken on the delts and triceps.
 
Incline Flye - 4 x 10-12
Flat Flye - 4 x 10-12
Pec Deck Flye - 4 x 10-12.
 
 
Plan Four: Full Court Press   

Another approach to pumping up your pecs is to devote an entire session to presses, hitting them from all angles. 
 
Bench Press - 4 x 6-12
Incline Press - 4 x 8-12
Decline Press - 4 x 10-12.
 
 
Plan Five: Incline/Decline
 
Kicking the flat bench to the curb will allow you to fully compartmentalize your chest into upper and lower sections and to focus more intently on each area. Additionally, if flat work takes its toll on your shoulders or elbows, you might find that altering the angles can be less straining. 
 
Incline Press - 3 x 8-10
Incline Flye - 3 x 10-12
Decline Press - 3 x 8-10
Decline Flye - 3 x 10-12.
 
 
Plan Six: Descending Sets
 
Think of descending sets as extended dropsets. Perform a set of 6-10 reps. Once you reach failure, strip a plate (or lower the weight stack) and do another set of 6-10. Repeat for four total sets. Those four dropsets equal one set.
 
Bench Press - 2 x 24-14
Pec Deck Flye - 2 x 24-40
Machine Incline Press - 2 x 24-40.
 
 
Plan Seven: High/Low
 
The high/low principle alternates a series of low-rep sets with a series of high-rep sets. The combination works both the fast- and slow-twitch muscle fibers to maximize size and strength and increase blood flow to the area.
 
Incline Dumbbell Press - 4 x 10,8,6,4
Incline Flye - 3 x 15-20
Bench Press - 3 x 8,6,4
Cable Crossover - 2 x 20-25.
 
 
Plan Eight: Unique Lifts
 
These moves are unique twists on familiar chest exercises. The different stimulus will give your muscles something new to adapt to - and help you break out of your boring chest rut. 
 
Pullover and Press - 3 x 8-10
 - Start by performing a barbell pullover, then bench press the weight. That's one rep. 
 
Smith Machine Stop Press - 3 x 6-8
 - Set the safety stops on the Smith machine so the bar stops about 5 inches above your chest when doing bench presses. When you lower the bar during any press from any angle, let the weight come to a stop when it reaches the supports (you can do this in the power rack as well) and keep it there for 1 second before pressing it back up. This way you've removed momentum from the equation and forced your pecs to work harder when pushing the weight back up.

One-Arm Pec Deck Flye - 3 x 10-12
Low Cable Crossover - 3 x 10-12. 


Back Power - Buster McShane


Thanks to Liam Tweed! 


POWER IN YOUR BACK
by R. T. "Buster" McShane
Full Squat - 500 x 3
Bench Press - 400
Bodyweight - 160
(1955)

This article, fourth in the series on power, covers the back and is therefore as important as any. As we all know from very early on in the game that the back is the seat of all strength and power, and the center of the nervous system is situated in the small of the back. 

Heavy progressive exercise will, we know, not only build the muscle but strengthen the nervous centers creating more abundance of energy and vitality, which are invaluable assets to any sportsman and of all importance to the lifter and body-builder.

The muscles of the back are undoubtedly the most interesting of all groups owing to their remarkable formation and to the great number and variations in shape of the muscles composing the group.  

A good back is not just broad - but heavily developed showing deep muscularity - what more impressive sight on the posing rostrum than the back view of an advanced physique showing the deep groove between the erectors running from the back of the neck into the hips and either side of the back packed with well developed muscular and shapely bulk and breadth.

On the type of training in this schedule - it will be noted that there is no direct overhead work or unusual stretching exercise such as chins behind neck and various pulley movement - admittedly these are very useful in developing a broad back, but they are easy work and only fully useful exercises in stretching the latissimus-dorsi and scapula - which should FOLLOW this basic back power program. This is important. Those exercises should follow this basic back power program. 

Those who have been following the previous schedules can be assured that the benefits from this one is equally substantial in gaining power and development. 

It is advisable to keep the shoulders back and hip well heated while training for strength in these movements. 

Increase all poundages as often as possible but only exceed limit on one lift in one workout.


Exercise No. 1: Barbell Clean Without Split
 - This exercise is the same movement as cleaning the bar for a normal press - but in this case with it being the complete exercise more weight should be used. It should not be forgotten that deep concentration should be used while performing the movement, thus increasing style, enthusiasm and poundage. The Russian lifters are very fond of using this exercise with a shoulder shrug after the clean, finding it of assistance in increasing their military press. 4-5 hard sets of 3-5 reps are ample. 


Exercise No. 2: Continental Clean
 - Add 20-40 pounds to the weight you have used in the previous exercise, the starting position being the same. The bar is pulled in as in a high dead lift, to sit on the belt at the waist as shown in photo. 

Note: Not many people do continental cleans any more. Here's a little tutorial by Peary Rader: 
There's more about them on this blog, just search around. 

After a short pause in getting settled the legs are used (as in jerking), giving the drive upwards, using the arms and shoulders cleaning the bar at the same time, using a split as shown in the second photo describing the lift. A couple of years ago this lift was very popular among professional lifters in America, many making between 350 and 400. Have your training partners stand-in when you are working heavy on this lift. Don't be afraid of the weight and inside four weeks you'll be surprised with your poundages. 6 sets of 2 reps. 


Exercise No. 3: Power Rowing Motion
 - This style is slightly different in performance to the often used strict B.B. motion. Here, the legs are used to an extent in assisting the motion. A slightly wider than shoulder width grip is advised, the bar touching the chest each rep. The photo shows the bar at the halfway position going up - this assistance movement really builds back power so give it 3-4 sets of 6-8 reps and don't be afraid to add weight. You should use your top C. & J. or 2-second pause bench press for sets in a short time.


Exercise No. 4: Dead Lift
 - Here is the exercise that builds the power needed for the first half of the clean, and works the whole back very adequately. Some men (including the author) do not find themselves favorable to this movement, obtaining lower back trouble when working very heavy. If you are among this category train with moderate weight, and the lower you keep your hips and more upright your back the better will be your leverage and smaller your chance of injury. 3 sets of 5.  

Blog Archive